









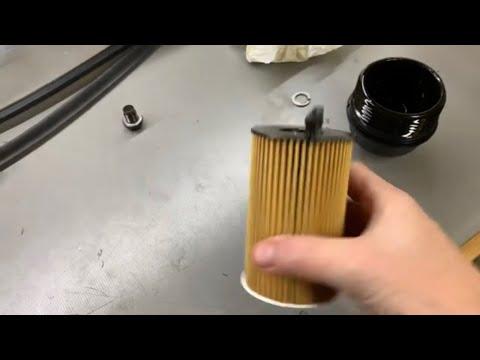





How to Change Engine Oil & Oil Filter on a 2019 Hyundai Santa Fe XL
Step-by-step DIY guide with tools, oil capacity, filter replacement tips, and drain plug torque specs for 2019
How to Change Engine Oil & Oil Filter on a 2019 Hyundai Santa Fe XL
Step-by-step DIY guide with tools, oil capacity, filter replacement tips, and drain plug torque specs for 2019


🔧 Santa Fe XL - Engine Oil & Oil Filter Change
This service drains the old oil, replaces the oil filter, and refills with fresh oil to protect your engine from wear and sludge. Doing it on schedule helps your Santa Fe XL run smoother and last longer.
Difficulty Level: Beginner | Estimated Time: 0.75-1.5 hours
⚠️ Safety & Precautions
- ⚠️ Work on level ground and support the SUV with jack stands (never the jack alone).
- ⚠️ Let the engine cool 20-30 minutes; hot oil can burn.
- ⚠️ Wear gloves and safety glasses; oil can splash when the drain plug comes out.
- ⚠️ Keep oil off belts and the exhaust; wipe spills immediately.
- ⚠️ Battery disconnect is not required for this job.
🔧 Required Tools
You'll need the following tools for this repair:
- Floor jack (rated 3-ton minimum)
- Jack stands (rated 3-ton minimum) - Qty: 2
- Wheel chocks - Qty: 2
- Safety glasses
- Nitrile gloves
- Drain pan (at least 10-quart capacity)
- 17mm socket
- 3/8" drive ratchet
- 3/8" drive torque wrench (10-100 ft-lbs range)
- Oil filter wrench (band-style)
- Funnel
- Trim clip remover
- 10mm socket
- Shop rags
🔩 Required Parts
HowToo sells all the parts you need for this repair:
- Engine oil (SAE 5W-30 full synthetic) - Qty: 7 quarts
- Oil filter - Qty: 1
- Oil drain plug crush washer - Qty: 1
📋 Before You Begin
- Park on level ground, shift to Park, and set the parking brake.
- Chock the rear wheels using wheel chocks.
- Warm the engine for 2-3 minutes, then shut it off. Warm oil drains faster.
- If you have a lower splash shield, you may need to remove it for access.
🔨 Step-by-Step Instructions
Follow these steps in order:
Step 1: Raise and support the front
- Place wheel chocks behind the rear tires.
- Lift the front using a floor jack (rated 3-ton minimum) at the front center jacking point.
- Set the vehicle onto jack stands (rated 3-ton minimum) at the proper support points.
- Give the SUV a gentle push to confirm it’s stable before going underneath.
Step 2: Remove the lower splash shield (if equipped)
- Remove the fasteners using a 10mm socket and 3/8" drive ratchet.
- Pop plastic clips using a trim clip remover (this tool lifts the center pin so the clip releases).
- Set the shield and fasteners aside in a small pile so nothing gets lost.
Step 3: Drain the engine oil
- Position your drain pan (at least 10-quart capacity) under the oil pan drain plug.
- Loosen and remove the drain plug using a 17mm socket and 3/8" drive ratchet.
- Let the oil drain until it slows to an occasional drip (usually 5-10 minutes).
- Remove the old crush washer from the drain plug and install the new oil drain plug crush washer.
Step 4: Reinstall and torque the drain plug
- Thread the drain plug in by hand first to avoid cross-threading.
- Tighten with a 3/8" drive torque wrench and 17mm socket: Torque to 39-49 Nm (29-36 ft-lbs).
- Wipe the area clean using shop rags.
Step 5: Remove the old oil filter
- Move the drain pan (at least 10-quart capacity) under the oil filter area (more oil will spill).
- Loosen the filter using an oil filter wrench (band-style), then spin it off by hand.
- Make sure the old rubber gasket came off with the filter. If it’s stuck to the engine, peel it off by hand.
Step 6: Install the new oil filter
- Lightly coat the new filter’s rubber gasket with fresh oil (use a fingertip).
- Spin the new filter on by hand until the gasket touches, then tighten an additional 3/4 turn by hand.
- Do not use the oil filter wrench (band-style) to tighten unless the filter instructions specifically require it.
Step 7: Reinstall the splash shield (if removed)
- Reinstall the shield using the 10mm socket and 3/8" drive ratchet.
- Reinstall clips using the trim clip remover as needed to set the centers back in place.
Step 8: Refill the engine with oil
- Lower the SUV off the jack stands (rated 3-ton minimum) using the floor jack (rated 3-ton minimum).
- Remove the oil fill cap and add oil using a funnel.
- Add about 6.5 quarts first, then wait 1 minute and check the dipstick.
- Top off slowly until the oil level is at (or just under) the FULL mark.
- Don’t overfill—add in small amounts.
Step 9: Start, check for leaks, and re-check level
- Start the engine and let it idle for 30-60 seconds.
- Shut the engine off and look underneath for leaks at the drain plug and oil filter.
- Wait 5 minutes, then check the dipstick again and top off if needed using the funnel.
✅ After Repair
- Dispose of used oil and the old filter properly (most parts stores accept used oil for recycling).
- Reset the maintenance reminder (if enabled): use steering wheel buttons to go to User Settings > Service Interval > Reset.
- Re-check for leaks after your first short drive.
💰 DIY vs Shop Cost
Shop Cost: $90-$160 (parts + labor)
DIY Cost: $35-$70 (parts only)
You Save: $55-$90 by doing it yourself!
Shop labor rates vary but typically run $100-$150/hour. This repair takes a shop approximately 0.7-1.0 hours.
🎯 Ready to get started?
HowToo makes it easy: same-day/2-day shipping on every part, plus all the tools and specialty tools you need! Check out the parts and tools sections below to add everything to your cart.