








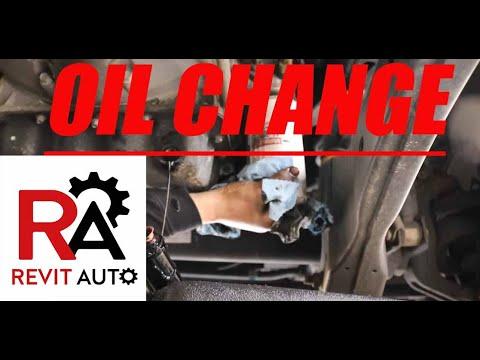







How to Change Engine Oil & Oil Filter on a 2017-2020 Ford F-250 Super Duty 6.2L (Engine: V8 6.2L)
Step-by-step DIY oil service with required tools/parts, drain plug torque specs, and oil life reset steps
How to Change Engine Oil & Oil Filter on a 2017-2020 Ford F-250 Super Duty 6.2L (Engine: V8 6.2L)
Step-by-step DIY oil service with required tools/parts, drain plug torque specs, and oil life reset steps for 2017, 2018, 2019, 2020


🔧 F-250 Super Duty - Engine Oil & Oil Filter Change
This service drains the old engine oil, replaces the oil filter, and refills with the correct oil for your F-250 Super Duty. Fresh oil protects the 6.2L from wear and helps prevent sludge buildup.
Difficulty Level: Beginner | Estimated Time: 0.7-1.2 hours
⚠️ Safety & Precautions
- ⚠️ Let the engine cool 15-30 minutes; hot oil can burn.
- ⚠️ If you lift the truck, support it with jack stands on a solid, level surface.
- ⚠️ Chock the rear wheels and keep the transmission in P with the parking brake set.
- ⚠️ Wear nitrile gloves and safety glasses; oil can irritate skin/eyes.
- ⚠️ No battery disconnect is required for this service.
🔧 Required Tools
You'll need the following tools for this repair:
- Floor jack (rated 3-ton minimum)
- Jack stands (rated 3-ton minimum)
- Wheel chocks
- 16mm socket
- 3/8" drive ratchet
- 3/8" drive extension (3"-6")
- Torque wrench (10-50 ft-lbs range)
- Oil drain pan (at least 10-quart)
- Oil filter wrench (cap or strap type)
- Funnel
- Shop rags
- Nitrile gloves
- Safety glasses
🔩 Required Parts
HowToo sells all the parts you need for this repair:
- Engine oil (SAE 5W-20 meeting Ford specification) - Qty: 7 quarts
- Engine oil filter - Qty: 1
- Drain plug gasket/washer - Qty: 1
📋 Before You Begin
- Park your F-250 Super Duty on level ground, set the parking brake, and place the shifter in P.
- Chock the rear wheels using wheel chocks.
- Warm the engine for 2-3 minutes, then shut it off. Warm oil drains faster.
- If you need more room underneath, lift the front with a floor jack and support with jack stands.
🔨 Step-by-Step Instructions
Follow these steps in order:
Step 1: Open the hood and prep the fill area
- Open the hood and remove the oil fill cap by hand.
- Pull the dipstick up slightly by hand (1-2 inches). This helps the crankcase vent while draining.
Step 2: Position the drain pan
- Slide the oil drain pan (at least 10-quart) under the oil pan drain plug.
- Use a flashlight if needed to confirm the pan is directly under the plug and slightly rearward (oil shoots out at first).
Step 3: Remove the drain plug and drain the oil
- Use a 16mm socket with a 3/8" drive ratchet to loosen and remove the drain plug.
- Let the oil drain until it slows to an occasional drip (typically 10-15 minutes).
- Wipe the drain plug and sealing surface with shop rags.
- If your plug uses a separate washer, replace it with the new drain plug gasket/washer.
Step 4: Reinstall and torque the drain plug
- Thread the drain plug in by hand first to avoid cross-threading.
- Use a torque wrench with a 16mm socket to tighten the drain plug: Torque to 28 Nm (21 ft-lbs).
Step 5: Remove the old oil filter
- Move the oil drain pan under the oil filter area (the filter will spill oil when removed).
- Use an oil filter wrench to loosen the oil filter, then spin it off by hand.
- Make sure the old rubber gasket came off with the filter (it can stick to the engine). Double-gasket causes leaks.
Step 6: Install the new oil filter
- Lightly coat the new filter’s rubber gasket with fresh oil (dip a finger in new oil).
- Thread the new filter on by hand until the gasket touches the base.
- Tighten by hand an additional 3/4 turn. Do not use the oil filter wrench to tighten unless space requires it.
- Hand-tight is correct for most filters.
Step 7: Refill with new oil
- Place a funnel in the oil fill opening.
- Add 6.5 quarts first, then reinstall the fill cap by hand.
- Wait 1 minute, then check the dipstick and top off as needed to reach the full mark (total is typically about 7 quarts with filter).
Step 8: Start, check for leaks, and recheck level
- Start the engine and let it idle for 30-45 seconds.
- Shut the engine off and look underneath for leaks at the drain plug and oil filter.
- Wait 5 minutes, then check the dipstick again and add oil if needed using the funnel.
Step 9: Reset the Oil Life Monitor
- Steering wheel menu method: Use the steering wheel controls to go to Settings > Vehicle > Oil Life Reset, then press and hold OK until it resets to 100%.
- If the menu isn’t present: With ignition ON and engine OFF, fully press and release the accelerator pedal 3 times within 10 seconds.
✅ After Repair
- Take a short 5-10 minute drive, then park on level ground and recheck for leaks.
- Recheck the dipstick one more time after 5 minutes and top off if needed.
- Dispose of used oil and the old filter properly (most auto parts stores accept used oil).
💰 DIY vs Shop Cost
Shop Cost: ₹7,000-₹12,000 (parts + labor)
DIY Cost: ₹3,500-₹7,000 (parts only)
You Save: ₹3,500-₹5,000 by doing it yourself!
Shop labor rates vary but typically run ₹1,500-₹3,000/hour. This repair takes a shop approximately 0.7-1.0 hours.
🎯 Ready to get started?
HowToo makes it easy: same-day/2-day shipping on every part, plus all the tools and specialty tools you need! Check out the parts and tools sections below to add everything to your cart.
Guide for Engine Oil replace for these Ford vehicles
| Year Make Model | Sub Model | Engine | Body Style |
|---|---|---|---|
| 2020 Ford F-250 Super Duty | - | V8 6.2L | - |
| 2020 Ford F-250 Super Duty | - | V8 6.7L | - |
| 2020 Ford F-250 Super Duty | - | V8 7.3L | - |
| 2019 Ford F-250 Super Duty | - | V8 6.2L | - |
| 2019 Ford F-250 Super Duty | - | V8 6.7L | - |
| 2018 Ford F-250 Super Duty | - | V8 6.2L | - |
| 2018 Ford F-250 Super Duty | - | V8 6.7L | - |
| 2017 Ford F-250 Super Duty | - | V8 6.2L | - |
| 2017 Ford F-250 Super Duty | - | V8 6.7L | - |