
















How to Change Engine Oil and Oil Filter on a 2016 Jeep Grand Cherokee (3.6L)
Step-by-step DIY oil change with tools, oil spec, filter/O-ring parts list, and torque specs for 2011, 2012, 2013, 2014, 2015, 2016, 2017, 2018, 2019, 2020, 2021
How to Change Engine Oil and Oil Filter on a 2016 Jeep Grand Cherokee (3.6L)
Step-by-step DIY oil change with tools, oil spec, filter/O-ring parts list, and torque specs for 2011, 2012, 2013, 2014, 2015, 2016, 2017, 2018, 2019, 2020, 2021


🔧 Grand Cherokee - Engine Oil & Oil Filter Change
On your Grand Cherokee, an oil change means draining the old engine oil, replacing the oil filter element in the top-mounted filter housing, and refilling with the correct oil. Fresh oil protects the 3.6L engine from wear, heat, and sludge.
Difficulty Level: Beginner | Estimated Time: 0.8-1.5 hours
⚠️ Safety & Precautions
- 🛑 Never work under a vehicle supported only by a jack; always use jack stands.
- 🔥 Engine oil can be hot; let the engine cool 10-20 minutes to avoid burns.
- 🧯 Keep oil off the exhaust and away from sparks; wipe spills immediately.
- 🔒 Set the parking brake and use wheel chocks before lifting the front end.
- 🔋 Battery disconnect is not required for an oil change.
🔧 Required Tools
You'll need the following tools for this repair:
- Floor jack (rated 3-ton minimum)
- Jack stands (rated 3-ton minimum)
- Wheel chocks
- Safety glasses
- Nitrile gloves
- Drain pan (at least 10-quart capacity)
- Funnel
- Shop rags
- 13mm socket
- 3/8" drive ratchet
- 3/8" drive torque wrench (10-100 Nm range)
- 24mm socket
- Oil filter cap socket (24mm, low-profile)
- Trim clip remover (specialty)
🔩 Required Parts
HowToo sells all the parts you need for this repair:
- Engine oil (SAE 5W-20 full synthetic, meets Chrysler MS-6395) - Qty: 6 quarts
- Oil filter element (cartridge type) - Qty: 1
- Oil filter housing O-ring kit - Qty: 1
- Oil drain plug crush washer or seal - Qty: 1
📋 Before You Begin
- 🧭 Park on a level surface, set the parking brake, and place wheel chocks behind the rear wheels.
- 🔍 Start the engine for 2-3 minutes to slightly warm the oil, then shut it off and wait 10-20 minutes.
- 🧰 Gather everything first; once you start draining, you don’t want to hunt for tools.
- 📝 Assumption: your Grand Cherokee has a lower splash shield/skid panel that may need to be removed for drain plug access.
🔨 Step-by-Step Instructions
Follow these steps in order:
Step 1: Lift and support the front safely
- Place wheel chocks behind the rear wheels.
- Use a floor jack (rated 3-ton minimum) to lift the front of the vehicle at the proper front jacking point.
- Set the vehicle down onto jack stands (rated 3-ton minimum).
- Give the vehicle a firm shake test.
Step 2: Remove the lower splash shield (if equipped)
- Put on safety glasses and nitrile gloves.
- Use a trim clip remover (specialty) to pop out plastic push-clips (a push-clip is a plastic fastener with a center pin).
- If bolts are present, remove them with a 13mm socket and 3/8" drive ratchet.
- Set the shield and fasteners aside in a neat pile.
Step 3: Open the engine oil fill to help draining
- Open the hood.
- Remove the oil fill cap (by hand).
- Pull the dipstick up slightly (by hand). This helps the oil drain faster and smoother.
Step 4: Drain the old engine oil
- Position the drain pan (at least 10-quart capacity) under the oil pan drain plug.
- Use a 13mm socket and 3/8" drive ratchet to loosen and remove the drain plug.
- Let the oil drain until it slows to an occasional drip (usually 5-10 minutes).
- Wipe the drain plug area with shop rags.
Step 5: Reinstall the drain plug with a new seal
- Install the new oil drain plug crush washer or seal on the plug.
- Thread the drain plug in by hand first to avoid cross-threading.
- Tighten with a 13mm socket and 3/8" drive torque wrench.
- Torque to 25 Nm (18 ft-lbs).
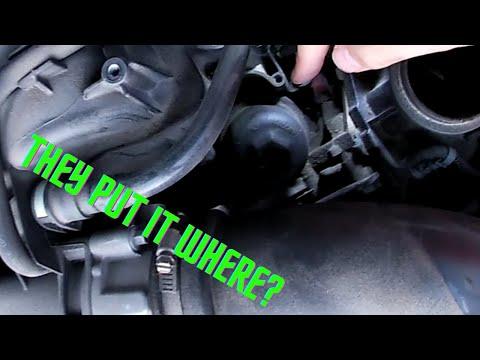
Step 6: Replace the oil filter element (top-mounted housing)
- Locate the oil filter housing on top of the engine (it has a cap with a hex shape).
- Place shop rags around the housing to catch small spills.
- Use a 24mm socket (or oil filter cap socket (24mm, low-profile)) with a 3/8" drive ratchet to loosen the filter cap.
- Lift the cap straight up; the old filter element usually comes out attached to the cap.
- Pull the old filter element off the cap (by hand).
- Remove the old O-ring(s) from the cap and install the new oil filter housing O-ring kit.
- Add a thin film of fresh oil (from the new oil bottle) to the new O-ring so it doesn’t pinch.
- Push the new oil filter element (cartridge type) onto the cap until it snaps/seats.
- Reinstall the cap by hand until snug, then tighten with the 24mm socket and 3/8" drive torque wrench.
- Torque to 25 Nm (18 ft-lbs).
Step 7: Refill with new oil
- Insert a funnel into the oil fill opening.
- Pour in Engine oil (SAE 5W-20 full synthetic, meets Chrysler MS-6395) - start with about 5.5 quarts.
- Reinstall the oil fill cap (by hand).
Step 8: Start, check for leaks, then set the oil level
- Start the engine and let it idle for 30-60 seconds.
- Look underneath for leaks at the drain plug area, and look around the oil filter housing for seepage.
- Shut the engine off and wait 5 minutes for oil to drain back into the pan.
- Check the dipstick, wipe it with a shop rag, reinsert fully, then read the level.
- Add oil in small amounts using the funnel until the level is in the safe range near the “FULL” mark.
Step 9: Reinstall the splash shield and lower the vehicle
- Reinstall the splash shield fasteners using the trim clip remover (specialty) and 13mm socket with 3/8" drive ratchet.
- Lift slightly with the floor jack (rated 3-ton minimum), remove the jack stands (rated 3-ton minimum), then lower to the ground.
✅ After Repair
- 🔎 Recheck the dipstick after a short 5-10 minute drive; top off if needed.
- 🧼 Wipe any oil residue off the skid/splash area to prevent smoke smell.
- 🗑️ Pour used oil into the empty oil bottles and recycle it properly; most parts stores accept used oil.
- 🧠 Reset the oil life reminder: turn ignition to RUN (engine OFF), fully press and release the accelerator pedal 3 times within 10 seconds, then turn ignition OFF.
💰 DIY vs Shop Cost
Shop Cost: $120-$200 (parts + labor)
DIY Cost: $35-$75 (parts only)
You Save: $85-$125 by doing it yourself!
Shop labor rates vary but typically run $100-$150/hour. This repair takes a shop approximately 0.8-1.2 hours.
🎯 Ready to get started?
HowToo makes it easy: same-day/2-day shipping on every part, plus all the tools and specialty tools you need! Check out the parts and tools sections below to add everything to your cart.