









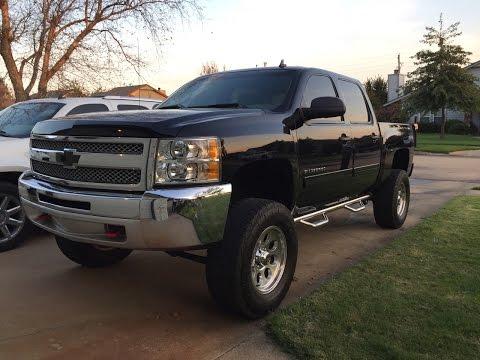






How to Change Engine Oil and Oil Filter on a 2012 Chevrolet Silverado 1500
Step-by-step instructions with tools, parts, torque specs, safety tips, and oil life reset for 2007, 2008, 2009, 2010, 2011, 2012, 2013
How to Change Engine Oil and Oil Filter on a 2012 Chevrolet Silverado 1500
Step-by-step instructions with tools, parts, torque specs, safety tips, and oil life reset for 2007, 2008, 2009, 2010, 2011, 2012, 2013


🔧 Engine Oil & Oil Filter - Replacement
Changing the oil and filter on your Silverado keeps the engine lubricated, cool, and clean. This truck uses a conventional drain plug and a spin-on oil filter, so the job is straightforward if you work carefully and keep everything clean.
Difficulty Level: Beginner | Estimated Time: 1-1.5 hours
⚠️ Safety & Precautions
- Work on a level surface and set the parking brake.
- Let the engine cool enough to avoid burns from hot oil and exhaust parts.
- Use jack stands if you lift the truck. Never rely on a jack alone.
- Keep oil away from belts, hoses, and the drive belt pulley area.
- Battery disconnect is not required for this repair.
🔧 Required Tools
You'll need the following tools for this repair:
- 15mm socket
- Ratchet
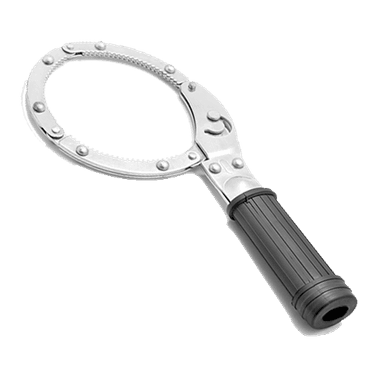
- Oil filter wrench
- Drain pan
- Funnel
- Torque wrench
- Floor jack (rated 3-ton minimum)
- Jack stands (rated for truck weight)
- Wheel chocks
- Safety glasses
- Nitrile gloves
- Shop towels
🔩 Required Parts
HowToo sells all the parts you need for this repair:
- Engine oil (5W-30 full synthetic) - Qty: 6 quarts
- Oil filter - Qty: 1
- Drain plug gasket - Qty: 1
📋 Before You Begin
- Park on level ground and engage the parking brake.
- Warm the engine for a few minutes, then shut it off. Warm oil drains faster.
- If the truck is lifted, support it securely with jack stands.
- Have the new filter and drain plug gasket ready before you start.
🔨 Step-by-Step Instructions
Follow these steps in order:
Step 1: Raise and secure the truck
- Use the floor jack to raise the front of the truck enough to reach the drain plug and filter.
- Support it with jack stands and chock the rear wheels.
- Give the truck a gentle shake.
Step 2: Remove the oil fill cap
- Open the hood and remove the engine oil fill cap by hand.
- This helps the oil drain smoothly.
Step 3: Drain the old oil
- Place the drain pan under the oil pan drain plug.
- Use the 15mm socket and ratchet to remove the drain plug.
- Let the oil drain completely.
- Inspect the drain plug threads and replace the gasket if needed.
- Torque to 25 Nm (18 ft-lbs) when reinstalling the drain plug.
Step 4: Remove the old oil filter
- Move the drain pan under the oil filter area.
- Use the oil filter wrench to loosen and remove the filter.
- Make sure the old rubber gasket comes off with the filter. If it sticks to the engine, remove it by hand.
- Check for a stuck gasket every time.
Step 5: Install the new oil filter
- Wipe the filter mounting surface clean with a shop towel.
- Put a thin film of fresh oil on the new filter gasket.
- Spin the new filter on by hand until the gasket touches, then tighten it as directed on the filter.
- Torque to 25 Nm (18 ft-lbs) if the filter spec is provided on the filter body.
Step 6: Reinstall the drain plug
- Reinstall the drain plug by hand first to avoid cross-threading.
- Use the 15mm socket and torque wrench to tighten it.
- Torque to 25 Nm (18 ft-lbs).
Step 7: Add new engine oil
- Place a funnel in the oil fill opening.
- Add about 5.5 quarts first, then check the dipstick.
- Top off slowly until the level reaches the full mark.
- Total capacity is about 6 quarts with filter.
Step 8: Start and inspect
- Start the engine and let it run for 30-60 seconds.
- Check underneath for leaks at the drain plug and filter.
- Shut the engine off and wait a few minutes, then recheck the dipstick and top off if needed.
✅ After Repair
- Verify the oil level on the dipstick with the truck on level ground.
- Check again for leaks after a short test drive.
- Reset the oil life monitor: turn ignition ON without starting, then press the accelerator pedal fully 3 times within 5 seconds.
- Confirm the oil life shows 100% after the reset.
💰 DIY vs Shop Cost
Shop Cost: $90-$160 (parts + labor)
DIY Cost: $35-$65 (parts only)
You Save: $55-$95 by doing it yourself!
Shop labor rates vary but typically run $100-$150/hour. This repair takes a shop approximately 0.7-1.0 hours.
🎯 Ready to get started?
HowToo makes it easy: same-day/2-day shipping on every part, plus all the tools and specialty tools you need! Check out the parts and tools sections below to add everything to your cart.