









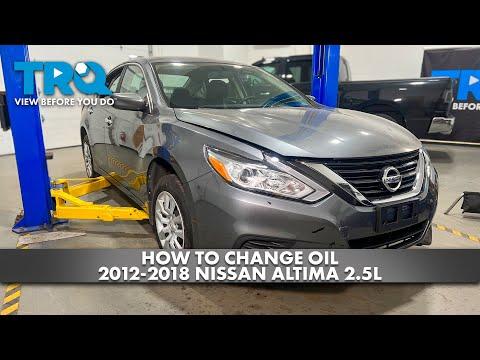






How to Change Engine Oil and Filter on a 2018 Nissan Altima 2.5L
Step-by-step DIY oil change guide with tools, 0W-20 oil capacity, torque specs, and reset tips for 2007, 2008, 2009, 2010, 2011, 2013, 2014, 2015, 2016, 2017, 2018, 2019, 2020, 2021, 2022, 2023
How to Change Engine Oil and Filter on a 2018 Nissan Altima 2.5L
Step-by-step DIY oil change guide with tools, 0W-20 oil capacity, torque specs, and reset tips for 2007, 2008, 2009, 2010, 2011, 2013, 2014, 2015, 2016, 2017, 2018, 2019, 2020, 2021, 2022, 2023


🔧 Altima - Engine Oil & Oil Filter Replacement
This repair drains the old engine oil, replaces the oil filter, and refills your Altima with fresh oil. Clean oil protects the 2.5L engine from wear and helps maintain proper fuel economy and engine life.
Difficulty Level: Beginner | Estimated Time: 30-60 minutes
⚠️ Safety & Precautions
- ⚠️ Work on a cool-to-warm engine, not a hot one. Hot oil can burn skin.
- ⚠️ Park on level ground and support the vehicle with jack stands if you raise it. Never rely on a jack alone.
- ⚠️ Keep oil off belts, exhaust parts, and the driveway. Wipe spills right away.
- ⚠️ Used oil is hazardous waste. Collect it in a drain pan and recycle it properly.
- ⚠️ Battery disconnect is not required for this oil change.
🔧 Required Tools
You'll need the following tools for this repair:
- 14mm socket
- 3/8-inch ratchet
- 3/8-inch torque wrench
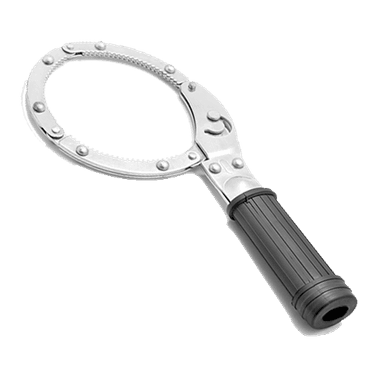
- Oil filter wrench, 65mm 14-flute cup style
- Oil drain pan, 6-quart minimum
- Floor jack, rated 2-ton minimum
- Jack stands, rated 2-ton minimum
- Wheel chocks
- Funnel
- Shop towels
- Nitrile gloves
- Safety glasses
🔩 Required Parts
HowToo sells all the parts you need for this repair:
- Engine oil, SAE 0W-20 full synthetic - Qty: 5 quarts
- Engine oil filter - Qty: 1
- Engine oil drain plug crush washer - Qty: 1
📋 Before You Begin
- 🅿️ Park your Altima on level ground and set the parking brake.
- 🧱 Place wheel chocks behind the rear wheels before lifting the front.
- 🌡️ Let the engine sit about 10-15 minutes after driving so the oil is warm, not hot. Warm oil drains better.
- 📘 A torque wrench is a tool that tightens bolts to a measured tightness so you do not over-tighten them.
- 🧰 A crush washer is a soft sealing washer on the drain plug. Replace it every oil change to prevent leaks.
🔨 Step-by-Step Instructions
Follow these steps in order:
Step 1: Raise and Secure the Front
- Use the floor jack, rated 2-ton minimum, to lift the front of your Altima at the front center jacking point.
- Place jack stands, rated 2-ton minimum, under the front side support points.
- Gently lower the vehicle onto the jack stands and lightly shake the car to confirm it is stable.
- Put on safety glasses and nitrile gloves.
- Never work under only a jack.
Step 2: Remove the Oil Filler Cap
- Open the hood and locate the oil filler cap on top of the engine.
- Remove the cap by hand and set it aside on a clean surface.
- Pull the dipstick up slightly by hand. This helps the oil drain smoothly.
Step 3: Drain the Old Engine Oil
- Slide the oil drain pan, 6-quart minimum, under the engine oil drain plug on the bottom of the oil pan.
- Use the 14mm socket and 3/8-inch ratchet to loosen the drain plug counterclockwise.
- Finish removing the plug by hand while keeping pressure inward, then pull it away quickly so oil flows into the pan.
- Let the oil drain until it slows to an occasional drip.
- Use shop towels to clean the drain plug area.
- Keep your hand out of the oil stream.
Step 4: Replace the Drain Plug Washer
- Remove the old crush washer from the drain plug by hand.
- Install the new engine oil drain plug crush washer onto the drain plug.
- Thread the drain plug into the oil pan by hand first. This prevents cross-threading, which means damaging the threads by starting the bolt crooked.
- Use the 14mm socket and 3/8-inch torque wrench to tighten the drain plug to Torque to 34 Nm (25 ft-lbs).
Step 5: Remove the Old Oil Filter
- Move the oil drain pan, 6-quart minimum, under the oil filter area.
- Use the oil filter wrench, 65mm 14-flute cup style, with the 3/8-inch ratchet to loosen the oil filter counterclockwise.
- Once loose, spin the filter off by hand.
- Make sure the old rubber gasket came off with the old filter. The gasket is the rubber sealing ring on the filter.
- Use shop towels to wipe the filter mounting surface clean.
- Double gaskets cause major oil leaks.
Step 6: Install the New Oil Filter
- Dip a gloved finger into fresh SAE 0W-20 full synthetic engine oil.
- Lightly coat the rubber gasket on the new engine oil filter with oil. This helps it seal and come off next time.
- Thread the new filter on by hand until the gasket touches the engine.
- Tighten the oil filter by hand an additional 2/3 turn.
- If using the oil filter wrench, 65mm 14-flute cup style, tighten gently only if needed. Do not crush the filter.
- Torque to 17.7 Nm (13 ft-lbs) if using a torque wrench adapter setup.
Step 7: Add Fresh Engine Oil
- Place the funnel into the oil filler opening.
- Pour in about 4.5 quarts of SAE 0W-20 full synthetic engine oil.
- Reinstall the oil filler cap by hand.
- Push the dipstick fully back into place by hand.
- The oil capacity with filter is approximately 4.9 quarts. Add the final amount slowly after checking the level.
Step 8: Start and Check for Leaks
- Start the engine and let it idle for 30-60 seconds.
- Turn the engine off and wait 5 minutes so the oil drains back into the pan.
- Use shop towels and a flashlight if available to inspect around the drain plug and oil filter for leaks.
- If you see seepage at the drain plug, use the 14mm socket and 3/8-inch torque wrench to recheck Torque to 34 Nm (25 ft-lbs).
Step 9: Set the Final Oil Level
- Pull the dipstick out by hand and wipe it clean with shop towels.
- Reinsert the dipstick fully, then pull it out again to read the level.
- Add oil through the funnel in small amounts until the level is near the full mark.
- Do not overfill. Too much oil can cause engine problems.
Step 10: Lower the Vehicle
- Use the floor jack, rated 2-ton minimum, to lift the front slightly off the jack stands.
- Remove the jack stands, rated 2-ton minimum.
- Lower your Altima slowly to the ground with the floor jack, rated 2-ton minimum.
- Remove the wheel chocks.
Step 11: Reset the Oil Maintenance Reminder
- Use the steering wheel buttons to access the vehicle information display.
- Select Settings > Maintenance > Oil and Filter > Reset.
- Confirm the reset using the steering wheel OK/Enter button.
- If your screen shows separate reminders, also reset Settings > Maintenance > Oil > Reset and Settings > Maintenance > Filter > Reset.
✅ After Repair
- ✅ Drive for 5-10 minutes, then park on level ground and check for leaks again.
- ✅ Recheck the dipstick after the engine sits 5 minutes. Top off only if needed.
- ✅ Write down the mileage and date of the oil change.
- ✅ Recycle used oil and the old oil filter at an auto parts store, service shop, or approved recycling center.
- ✅ Normal service interval is commonly every 5,000 miles for this engine under mixed driving conditions.
💰 DIY vs Shop Cost
Shop Cost: $80-$140 (parts + labor)
DIY Cost: $35-$65 (parts only)
You Save: $45-$75 by doing it yourself!
Shop labor rates vary but typically run $100-$150/hour. This repair takes a shop approximately 0.4-0.7 hours.
🎯 Ready to get started?
HowToo makes it easy: same-day/2-day shipping on every part, plus all the tools and specialty tools you need! Check out the parts and tools sections below to add everything to your cart.