









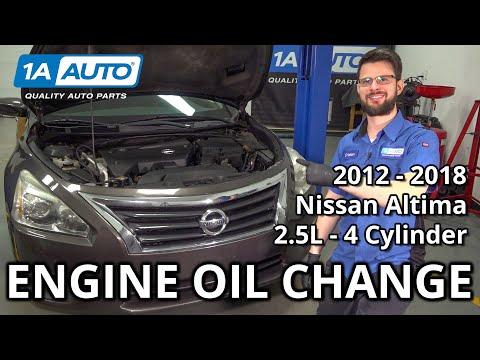






How to Change Engine Oil and Filter on a 2017 Nissan Altima
Step-by-step DIY guide with 0W-20 oil capacity, tools, torque specs, and safety tips for 2007, 2008, 2009, 2010, 2011, 2013, 2014, 2015, 2016, 2017, 2018, 2019, 2020, 2021, 2022, 2023, 2024
How to Change Engine Oil and Filter on a 2017 Nissan Altima
Step-by-step DIY guide with 0W-20 oil capacity, tools, torque specs, and safety tips for 2007, 2008, 2009, 2010, 2011, 2013, 2014, 2015, 2016, 2017, 2018, 2019, 2020, 2021, 2022, 2023, 2024


🔧 Altima - Engine Oil & Oil Filter Change
This repair drains the old engine oil, replaces the oil filter, and refills your Altima with fresh oil. Clean oil protects the 2.5L engine from wear, heat, and sludge buildup.
Difficulty Level: Beginner | Estimated Time: 30-60 minutes
⚠️ Safety & Precautions
- ⚠️ Work on level ground so the oil drains correctly and the vehicle stays stable.
- ⚠️ Never crawl under the Altima supported only by a jack. Always use jack stands.
- ⚠️ Engine oil can be hot. Let the engine cool until it is warm, not burning hot.
- ⚠️ Wear gloves and safety glasses. Used oil can irritate skin and eyes.
- ⚠️ Battery disconnect is not required for this oil change.
🔧 Required Tools
You'll need the following tools for this repair:
- 14mm socket
- 3/8-inch ratchet
- 3/8-inch torque wrench
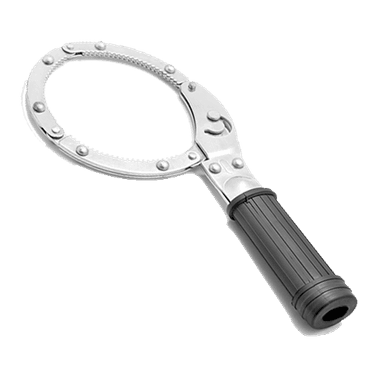
- Oil filter wrench 65mm 14-flute
- Drain pan 8-quart minimum
- Floor jack rated 2-ton minimum
- Jack stands rated 2-ton minimum
- Wheel chocks
- Funnel
- Shop towels
- Nitrile gloves
- Safety glasses
🔩 Required Parts
HowToo sells all the parts you need for this repair:
- Engine oil 0W-20 full synthetic - Qty: 4.9 quarts
- Engine oil filter - Qty: 1
- Oil drain plug crush washer - Qty: 1
📋 Before You Begin
- 🅿️ Park your Altima on level ground and apply the parking brake.
- 🧱 Place wheel chocks behind the rear wheels.
- 🌡️ Run the engine for 2-3 minutes, then shut it off. Warm oil drains faster.
- 🛢️ Open the hood and remove the oil filler cap. This helps oil drain smoothly.
- ♻️ Have a sealed container ready for used oil. Take used oil and the old filter to an approved recycling center.
🔨 Step-by-Step Instructions
Follow these steps in order:
Step 1: Raise and Secure the Front
- Use the floor jack rated 2-ton minimum at the front center jacking point to lift the front of the Altima.
- Place jack stands rated 2-ton minimum under the front side support points.
- Lower the car gently onto the jack stands.
- Use your hands to gently shake the car before going underneath. It should feel stable.
- Never trust a jack alone.
Step 2: Position the Drain Pan
- Put on nitrile gloves and safety glasses.
- Slide the drain pan 8-quart minimum under the engine oil drain plug.
- The drain plug is on the bottom of the engine oil pan.
- The oil pan is the metal pan at the lowest part of the engine that holds the engine oil.
Step 3: Remove the Oil Drain Plug
- Use a 14mm socket and 3/8-inch ratchet to loosen the drain plug counterclockwise.
- Finish removing the plug by hand so it does not fall into the drain pan.
- Let the oil drain until it slows to an occasional drip.
- Wipe the drain plug with shop towels.
Step 4: Replace the Drain Plug Washer
- Remove the old crush washer from the drain plug by hand.
- Install the new oil drain plug crush washer onto the drain plug.
- A crush washer is a soft sealing washer that prevents oil leaks at the drain plug.
- Always replace the washer.
Step 5: Reinstall the Drain Plug
- Thread the drain plug into the oil pan by hand first. This prevents cross-threading.
- Use the 14mm socket and 3/8-inch torque wrench to tighten the drain plug.
- Torque to 34 Nm (25 ft-lbs).
- Wipe the area clean with shop towels.
Step 6: Remove the Old Oil Filter
- Move the drain pan 8-quart minimum under the oil filter area.
- Use the oil filter wrench 65mm 14-flute and 3/8-inch ratchet to loosen the filter counterclockwise.
- Spin the oil filter off by hand.
- Keep the filter upright as much as possible because it will contain oil.
- Make sure the old rubber gasket came off with the old filter.
- The gasket is the rubber sealing ring on the top of the oil filter.
Step 7: Install the New Oil Filter
- Dip a gloved finger into new engine oil 0W-20 full synthetic.
- Lightly coat the rubber gasket on the new engine oil filter.
- Thread the new filter on by hand until the gasket touches the engine.
- Tighten the filter by hand another 2/3 turn.
- If using the oil filter wrench 65mm 14-flute, tighten gently only.
- Torque to 17.7 Nm (13 ft-lbs) if using a torque wrench and filter cup.
- Do not overtighten the filter.
Step 8: Lower the Vehicle
- Use the floor jack rated 2-ton minimum to lift the front slightly off the jack stands.
- Remove the jack stands rated 2-ton minimum.
- Lower the Altima carefully to the ground.
Step 9: Add New Engine Oil
- Place the funnel into the engine oil fill opening.
- Pour in about 4.5 quarts of engine oil 0W-20 full synthetic.
- Reinstall the oil filler cap by hand.
- Start the engine and let it idle for 30 seconds.
- Shut the engine off and wait 5 minutes.
Step 10: Check and Set the Oil Level
- Pull out the dipstick and wipe it clean with shop towels.
- Reinsert the dipstick fully, then pull it out again.
- The oil level should be between the low and full marks.
- Add oil through the funnel in small amounts until it reaches the full mark.
- Total capacity with filter is about 4.9 quarts.
- Add slowly to avoid overfilling.
Step 11: Reset the Maintenance Reminder
- Use the steering wheel controls to turn the ignition ON without starting the engine.
- Use the vehicle information display controls to select Settings > Maintenance > Oil and Filter.
- Select Reset, then confirm the reset.
- If your display shows a separate tire/filter schedule, reset only the oil-related reminder unless those services were also performed.
✅ After Repair
- ✅ Start the engine and let it idle for 1 minute.
- ✅ Look under the engine for leaks at the drain plug and oil filter.
- ✅ Shut the engine off, wait 5 minutes, and recheck the dipstick level.
- ✅ Recheck for drips after your first short drive.
- ✅ Dispose of used oil and the old oil filter at an approved recycling location.
💰 DIY vs Shop Cost
Shop Cost: $80-$130 (parts + labor)
DIY Cost: $35-$65 (parts only)
You Save: $45-$65 by doing it yourself!
Shop labor rates vary but typically run $100-$150/hour. This repair takes a shop approximately 0.3-0.5 hours.
🎯 Ready to get started?
HowToo makes it easy: same-day/2-day shipping on every part, plus all the tools and specialty tools you need! Check out the parts and tools sections below to add everything to your cart.