









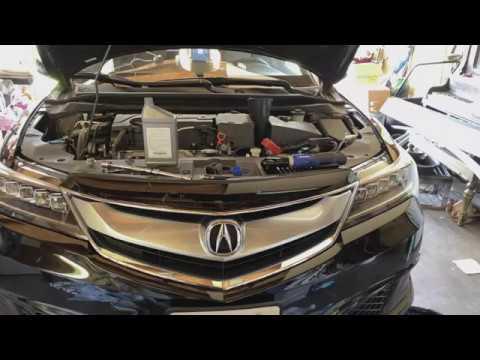







How to Change Dual-Clutch Transmission (DCT) Fluid on a 2013-2022 Acura ILX (Engine: Inline 4 2.4L)
Step-by-step drain-and-fill guide with required DCT fluid, tools, crush washers, and torque specs
How to Change Dual-Clutch Transmission (DCT) Fluid on a 2013-2022 Acura ILX (Engine: Inline 4 2.4L)
Step-by-step drain-and-fill guide with required DCT fluid, tools, crush washers, and torque specs for 2013, 2014, 2015


🔧 ILX - Dual-Clutch Transmission Fluid Drain & Fill
On your ILX with the dual-clutch automatic, a fluid drain-and-fill refreshes the special DCT fluid that lubricates gears and operates the clutch hydraulics. Doing this on schedule helps prevent harsh shifting, shudder, and premature transmission wear.
Difficulty Level: Intermediate | Estimated Time: 1.0-2.0 hours
Assumption: Your ILX uses the 8-speed dual-clutch and a drain/fill/level plug setup; refill amount is typically close to what drains out.
⚠️ Safety & Precautions
- ⚠️ Work on a level surface; support the car with jack stands before going underneath.
- ⚠️ Transmission fluid can be hot; let the car cool if you just drove it.
- ⚠️ Keep the car level while filling/checking level, or the fluid level will be wrong.
- ⚠️ Do not mix fluids; use only Acura/Honda-approved DCT fluid for this transmission.
- ⚠️ Battery disconnect is not required for a basic drain-and-fill.
🔧 Required Tools
You'll need the following tools for this repair:
- Floor jack (rated 2-ton minimum)
- Jack stands (rated 2-ton minimum)
- Wheel chocks
- Safety glasses
- Nitrile gloves
- Drain pan (at least 10-quart)
- Metric socket set (8mm-19mm)
- 3/8" drive ratchet
- 3/8" drive torque wrench (10-100 Nm range)
- Breaker bar (3/8" or 1/2")
- Flat trim clip tool
- Funnel with long hose
- Fluid transfer pump (specialty)
- Clean measuring container (at least 3-quart)
- Shop rags
🔩 Required Parts
HowToo sells all the parts you need for this repair:
- Dual-clutch transmission fluid (Acura/Honda DCT fluid) - Qty: 3 quarts
- Drain plug crush washer - Qty: 1
- Fill plug crush washer - Qty: 1
- Level/check plug crush washer - Qty: 1
📋 Before You Begin
- Park on level ground, set the parking brake, and place wheel chocks behind the rear tires.
- Warm the transmission slightly with a short 5–10 minute drive, then let it sit 10 minutes. This helps the fluid drain well without being dangerously hot.
- Raise the front with a floor jack and support with jack stands. Keep the car as level as possible.
- Remove any lower splash shield that blocks access using a metric socket set and flat trim clip tool.
🔨 Step-by-Step Instructions
Follow these steps in order:
Step 1: Locate the plugs
- From under the front of the car, locate the transmission drain plug (bottom of the transmission case) using a flashlight from your shop rags area (wipe grime to identify plugs clearly).
- Locate the fill plug (often on the front/side of the case) and the level/check plug (a smaller bolt on the case side if equipped).
- Pro tip: Always loosen the fill plug first.
Step 2: Loosen the fill plug first
- Place the drain pan under the transmission area (in case of drips).
- Use a ratchet with the correct socket from your metric socket set to crack the fill plug loose.
- If it’s tight, use a breaker bar carefully and keep the socket fully seated to avoid rounding.
Step 3: Drain the old fluid
- Move the drain pan directly under the drain plug.
- Use a ratchet and correct socket to remove the drain plug completely.
- Let it drain until it slows to an occasional drip (usually 10–15 minutes).
Step 4: Measure what came out
- Carefully pour the drained fluid into a clean measuring container.
- Write down the amount. You will refill the same amount as a baseline.
- Pro tip: Matching the drained amount prevents overfill.
Step 5: Reinstall the drain plug with a new washer
- Clean the drain plug and sealing surface with shop rags.
- Install a new drain plug crush washer on the drain plug.
- Thread the drain plug in by hand first, then tighten with a torque wrench.
- Torque to 49 Nm (36 ft-lbs).
Step 6: Fill with the correct DCT fluid
- Remove the fill plug fully using a ratchet and socket.
- Install a new fill plug crush washer on the fill plug (you’ll torque it after filling).
- Use a fluid transfer pump (specialty) or funnel with long hose to add dual-clutch transmission fluid.
- Add the same amount you measured in Step 4 (typical drain-and-fill is around 2–3 quarts).
Step 7: Set/check the fluid level (if equipped with a level/check plug)
- With the car still level on jack stands, locate the level/check plug.
- Place the drain pan under the level/check plug.
- Use a ratchet and the correct socket to remove the level/check plug briefly.
- Correct level is typically a small trickle/slow drip from the level port; if no fluid comes out, add small amounts through the fill hole using the fluid transfer pump (specialty), then re-check.
- Install a new level/check plug crush washer and tighten with a torque wrench.
- Torque to 12 Nm (9 ft-lbs).
Step 8: Reinstall and torque the fill plug
- Thread the fill plug in by hand to avoid cross-threading.
- Tighten using a torque wrench.
- Torque to 39 Nm (29 ft-lbs).
Step 9: Reinstall the splash shield
- Reinstall the lower splash shield using your metric socket set and flat trim clip tool.
- Make sure all clips/bolts are snug so it doesn’t rattle.
Step 10: Lower the car and do a quick function check
- Remove tools from under the car.
- Lower the car using the floor jack, remove the jack stands, then fully lower.
- Start the engine and, with your foot on the brake, slowly move the shifter through all positions (P-R-N-D) pausing 2 seconds each.
✅ After Repair
- Check underneath for leaks around the drain, fill, and level/check plugs with safety glasses on.
- Take a 10–15 minute test drive. Shifts should feel smooth and consistent.
- Recheck for leaks after the drive and the next morning.
- Dispose of used fluid at a recycling center or auto parts store that accepts waste oil/fluids.
💰 DIY vs Shop Cost
Shop Cost: $220-$450 (parts + labor)
DIY Cost: $60-$120 (parts only)
You Save: $160-$330 by doing it yourself!
Shop labor rates vary but typically run $100-$150/hour. This repair takes a shop approximately 1.0-1.5 hours.
🎯 Ready to get started?
HowToo makes it easy: same-day/2-day shipping on every part, plus all the tools and specialty tools you need! Check out the parts and tools sections below to add everything to your cart.
Guide for Automatic Transmission Fluid replace for these Acura vehicles
| Year Make Model | Sub Model | Engine | Body Style |
|---|---|---|---|
| 2022 Acura ILX | - | Inline 4 2.4L | - |
| 2021 Acura ILX | - | Inline 4 2.4L | - |
| 2020 Acura ILX | - | Inline 4 2.4L | - |
| 2019 Acura ILX | - | Inline 4 2.4L | - |
| 2018 Acura ILX | - | Inline 4 2.4L | - |
| 2017 Acura ILX | - | Inline 4 2.4L | - |
| 2016 Acura ILX | - | Inline 4 2.4L | - |
| 2015 Acura ILX | - | Inline 4 2.0L | - |
| 2015 Acura ILX | - | Inline 4 2.4L | - |
| 2014 Acura ILX | - | Inline 4 2.0L | - |
| 2014 Acura ILX | - | Inline 4 2.4L | - |
| 2014 Acura ILX | - | Inline 4 1.5L | - |
| 2013 Acura ILX | - | Inline 4 2.0L | - |
| 2013 Acura ILX | - | Inline 4 2.4L | - |
| 2013 Acura ILX | - | Inline 4 1.5L | - |