









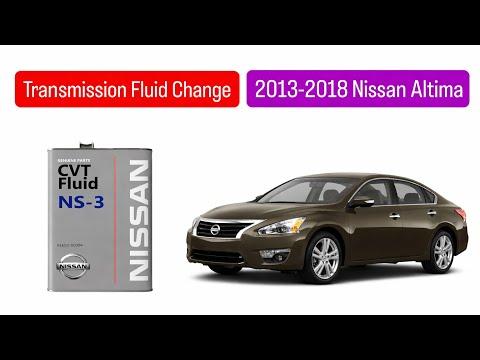







How to Change CVT Transmission Fluid on a 2018 Nissan Altima
Step-by-step drain-and-fill guide with NS-3 fluid, tools, torque specs, and safety tips for 2007, 2008, 2009, 2010, 2011, 2012, 2013, 2014, 2015, 2016, 2017, 2018, 2019, 2020, 2021, 2022, 2023, 2024, 2025
How to Change CVT Transmission Fluid on a 2018 Nissan Altima
Step-by-step drain-and-fill guide with NS-3 fluid, tools, torque specs, and safety tips for 2007, 2008, 2009, 2010, 2011, 2012, 2013, 2014, 2015, 2016, 2017, 2018, 2019, 2020, 2021, 2022, 2023, 2024, 2025


🔧 Altima - CVT Transmission Fluid Change
This job replaces the continuously variable transmission fluid, also called CVT fluid, in your Altima. The CVT is sensitive to fluid type and level, so use only Nissan-approved CVT fluid and set the final level with the transmission warmed to the correct temperature.
Difficulty Level: Intermediate | Estimated Time: 1.5-2.5 hours
Assumption: This procedure is for a drain-and-fill service, not a complete machine flush.
⚠️ Safety & Precautions
- ⚠️ Use only Nissan NS-3 CVT fluid; the wrong fluid can damage the CVT.
- ⚠️ Do not perform a high-pressure transmission flush on this CVT.
- ⚠️ Keep the vehicle level while filling and checking fluid level.
- ⚠️ CVT fluid can be hot enough to burn skin. Wear gloves and safety glasses.
- ⚠️ Support the vehicle with jack stands. Never work under a car supported only by a jack.
- ⚠️ Battery disconnect is not required for this service.
- ⚠️ A scan tool that reads CVT fluid temperature is strongly recommended. CVT level is temperature-dependent.
🔧 Required Tools
You'll need the following tools for this repair:
- Floor jack rated 2-ton minimum
- Jack stands rated 2-ton minimum
- Wheel chocks
- Safety glasses
- Nitrile gloves
- Drain pan 8-quart minimum
- Ratchet 3/8-inch drive
- 10mm socket
- 19mm socket
- Torque wrench 3/8-inch drive
- Plastic trim clip remover
- Long transmission funnel
- Measuring jug marked in quarts
- OBD2 scan tool with CVT fluid temperature data (specialty)
- Shop towels
🔩 Required Parts
HowToo sells all the parts you need for this repair:
- Nissan NS-3 CVT fluid - Qty: 5 quarts
- CVT drain plug crush washer - Qty: 1
- Lower splash shield clips - Qty: As needed
📋 Before You Begin
- Park your Altima on a flat, level surface.
- Set the parking brake and place wheel chocks behind the rear wheels.
- Let the engine and transmission cool if the car was recently driven.
- Use a scan tool to confirm you can view CVT fluid temperature. A scan tool reads vehicle data through the OBD2 port under the dashboard.
- Measure the amount of old fluid drained. This helps you refill close to the correct amount before final level checking.
🔨 Step-by-Step Instructions
Follow these steps in order:
Step 1: Raise and Support the Vehicle
- Use wheel chocks behind the rear wheels.
- Use a floor jack rated 2-ton minimum to lift the front of your Altima at the front center jacking point.
- Place jack stands rated 2-ton minimum under the front pinch weld support points.
- Lower the vehicle gently onto the jack stands.
- Make sure the car is stable before going underneath.
- Push gently to confirm stability.
Step 2: Remove the Lower Splash Shield
- Put on safety glasses and nitrile gloves.
- Use a 10mm socket to remove the splash shield bolts.
- Use a plastic trim clip remover to remove any plastic clips.
- Set the splash shield aside where it will not get stepped on.
Step 3: Locate the CVT Drain Plug
- Place a drain pan 8-quart minimum under the transmission drain plug.
- The CVT drain plug is on the bottom of the transmission case.
- Wipe the area with shop towels before removing the plug.
- Clean parts help prevent leaks.
Step 4: Drain the CVT Fluid
- Use a 19mm socket and ratchet 3/8-inch drive to loosen the CVT drain plug.
- Remove the plug by hand once loose. Keep your hand away from the fluid stream.
- Let the fluid drain until it slows to a drip.
- Pour the old fluid into a measuring jug marked in quarts and record the amount drained.
- Inspect the fluid. Dark fluid is common, but shiny metal flakes are not normal.
Step 5: Reinstall the Drain Plug
- Remove the old crush washer from the drain plug by hand. A crush washer is a soft sealing ring that should be replaced after removal.
- Install a new CVT drain plug crush washer.
- Thread the drain plug in by hand first to avoid cross-threading.
- Use a torque wrench 3/8-inch drive with a 19mm socket to tighten the drain plug.
- Torque to 34 Nm (25 ft-lbs)
Step 6: Add New CVT Fluid
- Open the hood and locate the CVT charging pipe/dipstick tube near the transmission side of the engine bay.
- Remove the cap or dipstick from the tube by hand.
- Insert a long transmission funnel into the tube.
- Add the same amount of Nissan NS-3 CVT fluid that you drained out, using the measuring jug marked in quarts.
- Start with slightly less than the drained amount if you are unsure. It is easier to add fluid than remove it.
- Never overfill a CVT.
Step 7: Warm the CVT and Circulate Fluid
- Connect the OBD2 scan tool with CVT fluid temperature data to the OBD2 port under the driver-side dashboard.
- Start the engine and keep your foot firmly on the brake pedal.
- Move the shifter slowly through P-R-N-D, pausing 3 seconds in each position.
- Return the shifter to P.
- Watch the scan tool until CVT fluid temperature reaches approximately 35-45°C (95-113°F).
- Keep the engine idling during the level check.
Step 8: Check the CVT Fluid Level
- With the engine idling and the vehicle level, remove the CVT dipstick or level indicator by hand if equipped.
- Wipe it clean with shop towels.
- Reinsert it fully, then remove it again to read the level.
- The fluid should be within the marked hot/check range while the CVT is at the specified temperature.
- If low, add Nissan NS-3 CVT fluid in small amounts through the long transmission funnel.
- If overfilled, the excess must be removed before driving.
Step 9: Reinstall the Splash Shield
- Turn the engine off.
- Use shop towels to clean any spilled fluid from the transmission case.
- Reinstall the lower splash shield.
- Use a plastic trim clip remover to reinstall reusable clips, or install new lower splash shield clips as needed.
- Use a 10mm socket to reinstall the splash shield bolts.
- Torque to 5 Nm (44 in-lbs)
Step 10: Lower the Vehicle
- Use the floor jack rated 2-ton minimum to lift the vehicle slightly off the jack stands.
- Remove the jack stands rated 2-ton minimum.
- Lower the vehicle slowly to the ground.
- Remove the wheel chocks.
✅ After Repair
- Start the engine and check under your Altima for leaks.
- Take a short, gentle test drive of 5-10 minutes.
- Recheck for leaks around the drain plug and splash shield area.
- If shifting feels abnormal, stop driving and recheck the CVT fluid level with a scan tool while fluid temperature is in range.
- Dispose of old CVT fluid at an approved recycling center or parts store that accepts used oil products.
💰 DIY vs Shop Cost
Shop Cost: $250-$450 (parts + labor)
DIY Cost: $80-$150 (parts only)
You Save: $170-$300 by doing it yourself!
Shop labor rates vary but typically run $100-$150/hour. This repair takes a shop approximately 1.0-1.5 hours.
🎯 Ready to get started?
HowToo makes it easy: same-day/2-day shipping on every part, plus all the tools and specialty tools you need! Check out the parts and tools sections below to add everything to your cart.