


How to Change CVT Transmission Fluid & Filter on a 2016 Audi A4 (Multitronic)
Step-by-step DIY service with tools list, fluid temp level-setting procedure, and torque specs
How to Change CVT Transmission Fluid & Filter on a 2016 Audi A4 (Multitronic)
Step-by-step DIY service with tools list, fluid temp level-setting procedure, and torque specs
🔧 A4 - CVT Transmission Fluid Change
On your A4’s CVT (continuously variable transmission), the fluid level is set by temperature and an overflow level tube, not a dipstick. This job is very sensitive to cleanliness and fill temperature—doing it correctly helps prevent shudder, slipping, and premature CVT wear.
Difficulty Level: Advanced | Estimated Time: 2.5-4.5 hours
Assumption: Your A4 uses the Audi Multitronic CVT (FWD).
⚠️ Safety & Precautions
- ⚠️ Work on a level surface; the CVT fill level is inaccurate if the car isn’t level.
- ⚠️ Use jack stands; never rely on a floor jack alone.
- ⚠️ Transmission fluid can be hot; wear gloves and safety glasses.
- ⚠️ Keep everything clean—dirt in a CVT can cause expensive damage.
- ⚠️ No battery disconnect is required for a fluid service.
🔧 Required Tools
You'll need the following tools for this repair:
- Floor jack (rated 3-ton minimum)
- Jack stands (rated 3-ton minimum)
- Wheel chocks
- Safety glasses
- Nitrile gloves
- Drain pan (10-quart minimum)
- Torque wrench (5-60 Nm range)
- Torx T25 bit socket
- Torx T30 bit socket
- 10mm socket
- Ratchet (3/8-inch drive)
- Extensions (3-inch and 6-inch)
- Allen hex bit set (5mm-10mm)
- Fluid transfer pump
- CVT fill adapter (specialty)
- Scan tool with live data for transmission fluid temperature (specialty)
- Brake cleaner
- Shop towels
- Plastic trim tool
🔩 Required Parts
HowToo sells all the parts you need for this repair:
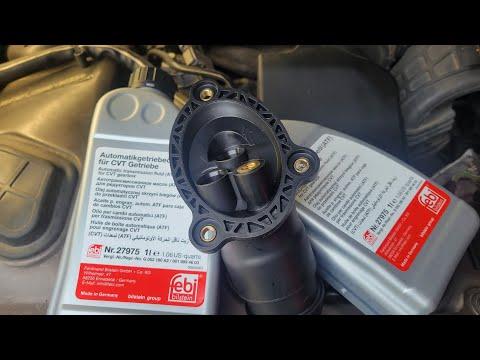
- CVT transmission fluid (Audi-spec CVT fluid) - Qty: 5-7 quarts
- CVT transmission filter kit - Qty: 1
- Transmission pan gasket - Qty: 1
- Drain plug seal - Qty: 1
- Fill plug seal - Qty: 1
📋 Before You Begin
- Park on a flat, level surface. Set the parking brake and chock the rear wheels.
- Warm the transmission with a 10–15 minute drive so the fluid drains well (not scorching hot).
- Set up your scan tool so you can view Transmission Fluid Temperature live. This is critical for final fluid level.
- Gather brake cleaner and towels—CVT service must stay very clean.
🔨 Step-by-Step Instructions
Follow these steps in order:
Step 1: Raise and level the car
- Use a floor jack (rated 3-ton minimum) to lift the front and support with jack stands (rated 3-ton minimum).
- Use the floor jack (rated 3-ton minimum) to lift the rear and support with jack stands (rated 3-ton minimum).
- Confirm the car is level left-to-right and front-to-back. Level is everything for CVT filling.
Step 2: Remove the lower engine splash shield
- Use a Torx T25 bit socket and ratchet (3/8-inch drive) to remove the belly pan screws.
- If any clips are stubborn, use a plastic trim tool to pop them free.
Step 3: Identify the CVT fill and drain points
- Place a drain pan (10-quart minimum) under the transmission.
- Locate the fill plug and drain plug on the CVT case.
- Inside the drain area is the overflow level tube (standpipe)—this is a small tube that sets the “correct” fluid height when the fluid is at the correct temperature.
Step 4: Crack the fill plug loose first
- Use the correct size from your Allen hex bit set (5mm-10mm) with a ratchet (3/8-inch drive) to loosen the fill plug (do not remove yet).
- This prevents a bad day where you drain the fluid and then discover the fill plug is seized.
Step 5: Drain the old CVT fluid
- Remove the drain plug using the correct size from the Allen hex bit set (5mm-10mm).
- Let it drain into the drain pan (10-quart minimum) until it slows to a drip.
- Clean the area using brake cleaner and shop towels.
Step 6: Remove the transmission pan and replace the filter
- Use a Torx T30 bit socket, extensions (3-inch and 6-inch), and ratchet (3/8-inch drive) to remove the pan bolts evenly.
- Lower the pan carefully—more fluid will spill. Keep the drain pan (10-quart minimum) positioned under it.
- Remove the old filter using a 10mm socket (if your filter is retained by bolts).
- Install the new filter from the CVT transmission filter kit and tighten fasteners to Torque to 8-10 Nm (6-7 ft-lbs).
- Clean the pan and magnet(s) with brake cleaner and shop towels. Gray paste is normal; chunks are not.
Step 7: Reinstall the pan with a new gasket
- Install the new transmission pan gasket.
- Hand-thread all pan bolts first, then snug them in a crisscross pattern using a Torx T30 bit socket.
- Tighten pan bolts evenly to Torque to 10 Nm (7 ft-lbs).
Step 8: Reinstall drain plug with a new seal
- Install the new drain plug seal on the drain plug.
- Install and tighten the drain plug using the correct size from the Allen hex bit set (5mm-10mm).
- Tighten to Torque to 45 Nm (33 ft-lbs).
Step 9: Fill the CVT with the engine OFF (initial fill)
- Remove the fill plug fully using the correct size from the Allen hex bit set (5mm-10mm).
- Install your CVT fill adapter (specialty) into the fill port.
- Use the fluid transfer pump to pump in Audi-spec CVT transmission fluid until fluid begins to run back out.
- Reinstall the fill plug loosely by hand (do not torque yet).
Step 10: Start engine, cycle gears, and set final level by temperature
- Start the engine and keep your foot on the brake.
- Use your scan tool with live data for transmission fluid temperature (specialty) to monitor CVT fluid temperature.
- Slowly move the shifter through P-R-N-D-S (pause 2 seconds in each), then back to P. This fills the circuits.
- With the engine idling, remove the fill plug again using the correct size from the Allen hex bit set (5mm-10mm).
- Use the fluid transfer pump to add fluid until it runs out in a steady stream.
- Wait until the temperature is in the “level set” range on your scan tool (commonly 35°C to 45°C).
- At that temperature, the correct level is a thin stream/drip from the fill opening (that’s the standpipe doing its job).
Step 11: Install fill plug with a new seal
- Install the new fill plug seal.
- Install and tighten the fill plug using the correct size from the Allen hex bit set (5mm-10mm).
- Tighten to Torque to 45 Nm (33 ft-lbs).
- Clean any spilled fluid using brake cleaner and shop towels.
Step 12: Reinstall the splash shield
- Reinstall the belly pan using a Torx T25 bit socket and ratchet (3/8-inch drive).
✅ After Repair
- With the car still on stands, start the engine and visually check for leaks at the pan, drain, and fill areas.
- Lower the car safely and road test for 10–15 minutes. Confirm smooth takeoff and no flare/slip.
- Re-check underneath for seepage after the test drive.
- If you have a scan tool, scan for transmission codes and clear any that were set during service.
💰 DIY vs Shop Cost
Shop Cost: $450-$900 (parts + labor)
DIY Cost: $140-$320 (parts only)
You Save: $310-$580 by doing it yourself!
Shop labor rates vary but typically run $100-$150/hour. This repair takes a shop approximately 2.5-4.5 hours.
🎯 Ready to get started?
HowToo makes it easy: same-day/2-day shipping on every part, plus all the tools and specialty tools you need! Check out the parts and tools sections below to add everything to your cart.
