


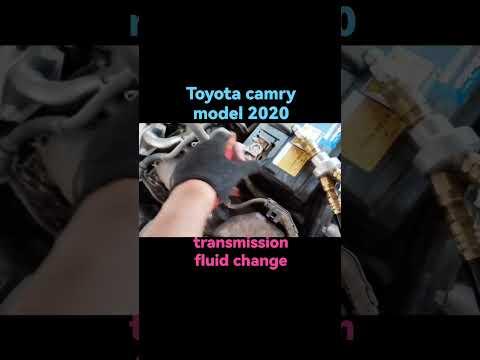


How to Change Automatic Transmission Fluid on a 2020 Toyota Camry
Step-by-step ATF drain and fill with tools, parts list, torque specs, safety tips, and DIY vs shop cost
How to Change Automatic Transmission Fluid on a 2020 Toyota Camry
Step-by-step ATF drain and fill with tools, parts list, torque specs, safety tips, and DIY vs shop cost
🔧 Camry - Automatic Transmission Fluid Change
You’ll be doing a drain-and-fill on the 8-speed automatic in your Camry. This means draining the old fluid, refilling with new Toyota WS fluid, then setting the level at the correct temperature.
Difficulty Level: Intermediate | Estimated Time: 2–3 hours
⚠️ Safety & Precautions
- ⚠️ Always support the car with jack stands; never rely only on a jack.
- ⚠️ Transmission fluid and exhaust parts can be very hot; let the car cool before starting.
- ⚠️ Wear safety glasses and nitrile gloves to protect from hot, slippery ATF.
- ⚠️ Keep the car level (front and rear at same height) when checking fluid level; this is critical.
- ⚠️ Work in Park with parking brake fully applied and wheels chocked.
- Battery disconnect is not required for this job.
🔧 Required Tools
You'll need the following tools for this repair:
- 🛠️ Floor jack (rated 3-ton minimum)
- 🛠️ Jack stands (rated 3-ton, Qty: 4)
- 🛠️ Wheel chocks
- 🛠️ 10mm socket
- 🛠️ 12mm socket
- 🛠️ 14mm socket
- 🛠️ 3/8" drive ratchet
- 🛠️ 3/8" drive torque wrench (5–80 ft-lb range)
- 🛠️ 6mm hex/Allen socket
- 🛠️ Socket extension set
- 🛠️ Flathead screwdriver (medium)
- 🛠️ Drain pan (10-liter capacity minimum)
- 🛠️ Funnel with long flexible hose
- 🛠️ Fluid transfer pump (hand pump or drill pump)
- 🛠️ Plastic measuring jug (at least 5 liters, with markings)
- 🛠️ OBD2 scan tool with transmission temperature reading (specialty)
- 🛠️ Shop rags or paper towels
- 🛠️ Nitrile gloves
- 🛠️ Safety glasses
🔩 Required Parts
HowToo sells all the parts you need for this repair:
- 🧩 Toyota WS automatic transmission fluid - Qty: 5–6 liters (you will likely use ~3.5–4 L, but buy extra)
- 🧩 Transmission drain plug gasket - Qty: 1
- 🧩 Transmission fill plug gasket - Qty: 1
- 🧩 Transmission overflow/inspection plug gasket - Qty: 1
- 🧩 Undercover plastic clips (if any break) - Qty: 4–6
- 🧩 Brake cleaner spray - Qty: 1
📋 Before You Begin
- Park your Camry on a flat, solid surface. Set the parking brake and chock the rear wheels.
- Make sure the transmission is at normal operating temperature if you want easier draining, then let it cool enough so parts are safe to touch.
- Gather all tools and parts before lifting the car.
- Plan to keep the car level on jack stands during the fluid level check step.
- Install an OBD2 scan tool app that can show ATF temperature (transmission oil temp); you’ll need to watch this later.
🔨 Step-by-Step Instructions
Follow these steps in order:
Step 1: Lift and support the car safely
- Place wheel chocks behind the rear tires.
- Use the floor jack on the front center jacking point to lift the front of your Camry.
- Set the front of the car on jack stands at the pinch welds under the doors.
- Lift the rear slightly if needed and place rear jack stands so the car sits level front to back.
- Check stability by gently rocking the car.
Step 2: Remove the engine under cover
- Use a 10mm socket and flathead screwdriver to remove the bolts and plastic clips from the lower engine cover (undertray).
- Lower the cover and set it aside.
- Keep bolts and clips grouped so you remember positions.
Step 3: Identify the transmission plugs
- Locate the transmission on the driver’s side of the engine bay underside.
- On the transmission pan bottom you’ll see a main drain plug (6mm hex) with an internal overflow/level plug.
- On the side of the transmission case, slightly above the pan, find the fill plug (14mm bolt head).
- Clean around all plugs with a rag so dirt doesn’t enter.
Step 4: Loosen the fill plug first
- Use a 14mm socket and ratchet to crack loose the side fill plug, but do not remove it yet.
- This confirms you can refill the transmission; never drain before you know you can fill.
Step 5: Remove the overflow plug
- Place the drain pan under the center of the transmission pan.
- Use the 6mm hex socket and ratchet to remove only the small center overflow plug from the main drain plug.
- A small amount of fluid may drip; let it drain.
- Set the overflow plug and its gasket aside.
Step 6: Drain the old fluid
- With the drain pan still under the pan, use the 6mm hex socket to remove the larger outer drain plug (the whole assembly).
- Allow fluid to drain completely into the pan; this may take 10–15 minutes.
- Measure the drained fluid amount by pouring it into the plastic measuring jug. Note the volume; you will refill with about the same amount.
- Wipe the drain area clean with a rag.
Step 7: Reinstall drain plug and overflow tube
- The overflow tube is part of the drain plug assembly that threads into the pan.
- Install a new drain plug gasket on the drain plug assembly.
- Thread the drain plug assembly back into the pan by hand, then tighten with the 6mm hex socket and torque wrench to 40 Nm (30 ft-lb).
- Install a new gasket on the small overflow plug and thread it into the center of the drain plug by hand.
- Tighten the overflow plug with the 6mm hex socket to 20 Nm (15 ft-lb).
Step 8: Fill fresh ATF from the side fill plug
- Remove the side fill plug completely using the 14mm socket.
- Install a new fill plug gasket on the plug and set aside.
- Insert the hose from your fluid transfer pump or funnel with long hose into the fill hole.
- Pump in new Toyota WS ATF equal to the amount you measured during draining (usually around 3.5–4 liters).
- Stop when fluid starts to trickle back out of the fill hole.
- Temporarily install the fill plug by hand to prevent dripping (just snug, don’t torque yet).
Step 9: Warm up the transmission and monitor temperature
- Lower the car enough so that you can safely sit inside and start it, but it must remain level on jack stands for the level check.
- Plug in your OBD2 scan tool and open the app to view ATF temperature (look for “Trans Temp” or similar).
- Start the engine with the transmission in Park.
- With the brake pedal firmly pressed, slowly move the shifter: P → R → N → D → S, pausing 2–3 seconds in each, then back to P. Do this 2–3 times to circulate fluid.
- Let the engine idle until ATF temp is between 35–45°C (95–113°F). This is the correct range for checking level on this transmission.
- Do not rev the engine; just let it idle.
Step 10: Set the final fluid level using the overflow plug
- With the engine still idling and ATF temp in the 35–45°C range, raise the car if needed so you can get under it safely while it remains level on jack stands.
- Place the drain pan under the transmission drain area.
- Use the 6mm hex socket to carefully remove the small overflow plug from the center of the drain plug while the engine is running.
- Watch the fluid flow:
- If a steady stream comes out and then slows to a thin drip, this is correct. When it becomes a thin drip, the level is set.
- If almost nothing comes out, the fluid is low. In that case, reinstall the overflow plug loosely, add more ATF through the side fill hole using the fluid pump, then repeat this step.
- Once the fluid is a thin drip (continuous but not a stream), reinstall the overflow plug with a new gasket and tighten with the 6mm hex socket to 20 Nm (15 ft-lb).
Step 11: Final tighten of fill plug
- Turn off the engine.
- Remove the side fill plug again briefly to confirm fluid is at the bottom of the fill hole; a small amount may drip.
- Reinstall the fill plug with its new gasket.
- Use the 14mm socket and torque wrench to tighten the fill plug to 49 Nm (36 ft-lb).
- Spray a little brake cleaner on the area and wipe with a rag so you can later see if any new leaks appear.
Step 12: Reinstall under cover and lower the car
- Reinstall the lower engine cover using the 10mm socket and any saved clips.
- Replace any broken clips with new ones.
- Use the floor jack to lift slightly, remove the jack stands, and lower the car to the ground.
Step 13: Clean up and dispose of old fluid
- Pour the used ATF into sealed containers using the funnel.
- Take it to a recycling center or workshop that accepts used oil/ATF; do not dump it.
✅ After Repair
- Start the engine and shift through all gears again with your foot on the brake; feel for smooth engagement.
- Take a short, gentle test drive: check that shifts are smooth and there are no unusual noises.
- Park, let the car cool a bit, then inspect underneath with a flashlight for any fresh ATF leaks around the drain, overflow, or fill plugs.
- If you have the OBD2 tool, confirm ATF temperature stays in a normal range on a longer drive; any error lights should stay off.
- Recheck for leaks again the next day.
💰 DIY vs Shop Cost
Shop Cost: $250–$400 (parts + labor)
DIY Cost: $80–$140 (parts only, depending on fluid price and gaskets)
You Save: $170–$260 by doing it yourself!
Shop labor rates vary but typically run $100–$150/hour. This repair takes a shop approximately 1.5–2.0 hours.
🎯 Ready to get started?
HowToo makes it easy: same-day/2-day shipping on every part, plus all the tools and specialty tools you need! Check out the parts and tools sections above to add everything to your cart.
Guide for Brake Cleaner replace for these Toyota vehicles
| Year Make Model | Sub Model | Engine | Body Style |
|---|
