


How to Change Automatic Transmission Fluid on a 2020 Ford Escape
Step-by-step DIY drain and refill guide with tools, parts list, safety tips, and fluid level procedure
How to Change Automatic Transmission Fluid on a 2020 Ford Escape
Step-by-step DIY drain and refill guide with tools, parts list, safety tips, and fluid level procedure
🔧 Escape - Transmission Fluid Drain & Refill
You’ll be draining and refilling the automatic transmission fluid on your Escape’s 8‑speed automatic. This refreshes part of the old fluid, helps protect the internal clutches, and can improve shift quality if done correctly.
Difficulty Level: Intermediate | Estimated Time: 2–3 hours
⚠️ Safety & Precautions
- ⚠️ Work on a completely level surface; the fluid level is checked with the vehicle level.
- ⚠️ Support the Escape with jack stands under proper points; never rely on a jack alone.
- ⚠️ The exhaust and transmission will get very hot after driving; allow cooling time before working near them.
- ⚠️ Use eye protection; hot fluid can spray when you remove the drain or level plugs.
- ⚠️ Keep the engine running only when the vehicle is safely on stands, in Park, with the parking brake firmly set, and wheels chocked.
- ⚠️ Do not overfill the transmission; incorrect level can cause damage.
- ⚠️ This transmission uses a sealed fill/level system and ideally requires a scan tool to measure fluid temperature accurately.
- ⚠️ Battery disconnect is not required for this job.
🔧 Required Tools
You'll need the following tools for this repair:
- 🧰 Floor jack (rated 3-ton minimum)
- 🧰 Jack stands (rated 3-ton, set of 4)
- 🧰 Wheel chocks
- 🧰 Socket set (8mm–19mm metric)
- 🧰 Ratchet (3/8" drive)
- 🧰 Torque wrench (3/8" drive, 5–80 ft‑lb range)
- 🧰 Torx bit set (T25–T40)
- 🧰 Hex/Allen bit set (metric)
- 🧰 Drain pan (at least 10 liter capacity)
- 🧰 Fluid transfer pump (hand pump for ATF)
- 🧰 Small funnel (fits fluid pump if needed)
- 🧰 Trim clip removal tool
- 🧰 Flathead screwdriver (medium)
- 🧰 Rag set / shop towels
- 🧰 Safety glasses
- 🧰 Nitrile gloves
- 🧰 OBD2 scan tool with live data (transmission fluid temperature) (specialty)
🔩 Required Parts
HowToo sells all the parts you need for this repair:
- 🔩 Automatic transmission fluid (Mercon ULV or Ford‑spec equivalent) - Qty: 5–6 liters (for one drain & refill)
- 🔩 Transmission drain plug sealing washer (if equipped) - Qty: 1
- 🔩 Transmission level plug sealing washer (if equipped) - Qty: 1
- 🔩 Brake cleaner or parts cleaner spray - Qty: 1–2 cans
- 🔩 Shop rags - Qty: 1 pack
📋 Before You Begin
- 🗺️ Park the Escape on level ground, set the parking brake, and place the transmission in Park.
- 🧊 Let the vehicle sit until the exhaust and transmission are cool enough to touch.
- 📏 Plan to check level with the transmission fluid at about normal operating temperature. A scan tool makes this precise.
- 📸 Take a quick photo under the vehicle before removing anything; it helps with reassembly.
- ♻️ Have a plan to reuse, measure, or recycle the old fluid. Use the old fluid volume as a guide for how much new fluid to install.
🔨 Step-by-Step Instructions
Follow these steps in order:
Step 1: Safely raise and support the vehicle
- Use the floor jack (3-ton) to lift the front of the Escape at the front jacking point shown in your owner’s manual.
- Place jack stands (3-ton) under the front pinch welds or frame points and lower the vehicle onto them with the floor jack.
- Repeat for the rear so that all four corners are on stands and the vehicle sits level.
- Place wheel chocks behind at least one rear wheel for extra safety.
- Give the vehicle a gentle shake to confirm it’s stable.
Step 2: Remove any underbody shields
- Use the socket set (commonly 7mm–10mm sockets) and ratchet to remove bolts holding the front undertray or splash shield.
- Use the trim clip removal tool or flathead screwdriver to pop out any plastic clips.
- Lower the shield and set it aside where the fasteners won’t get lost.
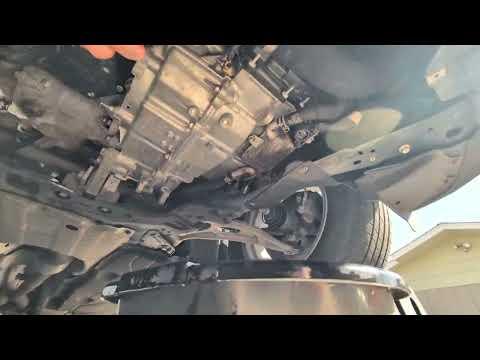
Step 3: Locate the transmission drain and level plugs
- The transmission is on the driver’s side of the engine bay, roughly under the left side of the engine, extending toward the rear.
- On the transmission pan or case you will typically see:
- A drain plug at the lowest point of the pan or case bottom.
- A level plug (often higher up on the side or in the drain plug assembly) used to set the correct fluid height.
- Use the hex/Allen bit set or socket set with ratchet to gently check which bit size fits each plug snugly. Do not loosen yet.
- Confirm you can access both drain and level plugs before proceeding.
Step 4: Verify that the level plug can be opened
- Position the drain pan under the level plug area in case fluid drips.
- Use the correct hex bit with ratchet or socket with ratchet to carefully crack the level plug loose, then snug it back slightly. Do not remove fully yet.
- This ensures you will be able to set the proper level after refilling.
Step 5: Drain the old transmission fluid
- Move the drain pan under the main drain plug at the bottom of the pan or case.
- Use the correct socket or hex bit with ratchet to slowly loosen and remove the drain plug.
- Allow fluid to drain completely. This can take 10–15 minutes.
- Measure the amount of old fluid in the drain pan using a marked container; note the volume.
- Inspect the drain plug for metal debris. A light “sludge” is normal; chunks or large shavings are not.
Step 6: Reinstall the drain plug
- Install a new drain plug sealing washer if your plug uses one.
- Thread the plug in by hand to avoid cross‑threading.
- Use the correct socket or hex bit with torque wrench to tighten the drain plug to manufacturer specification torque (check a manual or data source for the exact value).
- Wipe the area clean with shop towels and brake cleaner.
Step 7: Fill new fluid from the upper fill port
- Locate the fill plug on the transmission case (usually higher on the side of the transmission). It may require a socket or hex bit.
- Place the drain pan under the area in case of spills.
- Use the correct socket or hex bit with ratchet to remove the fill plug.
- Attach the fluid transfer pump to your new Mercon ULV fluid container.
- Pump in slightly less new fluid than what you measured coming out (for example, if 4.0 liters drained, start with about 3.5–3.8 liters).
- Pump slowly to avoid spilling and to keep track of volume.
Step 8: Initial fill plug and level plug preparation
- Install the fill plug loosely by hand using the socket or hex bit with ratchet so fluid won’t spill when you start the engine.
- Ensure the level plug is still installed but only snug (not overtightened) so it can be removed later while hot.
Step 9: Warm up the transmission (with scan tool method)
- Plug the OBD2 scan tool with live data into the OBD2 port (under the dash, driver’s side).
- Start the engine with your foot on the brake; keep the Escape on jack stands with parking brake set.
- On the scan tool, find transmission fluid temperature in live data.
- With your foot on the brake, slowly shift through all gears: P → R → N → D → manual (if available) and back to P, pausing 3–5 seconds in each position. This fills the circuits.
- Let the vehicle idle until the transmission fluid reaches the specified level‑check temperature range (commonly around 40–50°C / 104–122°F for Ford 8‑speed, but verify with service info).
Step 10: Set the fluid level (scan tool method)
- With the engine idling in Park and fluid temp in the proper range, place the drain pan under the level plug.
- Use the correct socket or hex bit with ratchet to carefully remove the level plug.
- Allow excess fluid to drain. When the fluid slows to a light drip, the level is set.
- Install a new level plug sealing washer if used.
- Reinstall the level plug and tighten with a torque wrench to manufacturer specification torque.
- Carefully check for leaks with the engine still idling.
Alternative Step 9/10: If you do NOT have a scan tool
- This method is less precise and not ideal, but commonly used by DIYers:
- Start the engine, keep the Escape on jack stands, parking brake set.
- Shift slowly through all gears as described above, then back to Park.
- Let it idle for 10–15 minutes so the transmission reaches a “warm but not too hot” state (you should be able to touch the pan but it feels quite warm).
- With the engine idling in Park, place the drain pan under the level plug.
- Use the correct socket or hex bit with ratchet to remove the level plug.
- If a solid stream comes out for more than a few seconds, let it drain until it becomes a thin drip, then reinstall the plug.
- If nothing (or just a drop) comes out, quickly install the plug and:
- Shut off the engine.
- Add about 0.25 liter more fluid through the fill plug using the fluid pump.
- Repeat the warm‑up and level plug check until a small stream then drip occurs at warm idle.
- Tighten the level plug with a torque wrench to manufacturer specification torque.
Step 11: Final checks underneath
- Turn off the engine.
- Use brake cleaner and shop towels to clean any spilled fluid around the drain and level plugs.
- Inspect both plugs and surrounding area for any sign of leakage.
- Reinstall the underbody shield with the socket set, ratchet, and trim clip tool. Tighten fasteners snugly but do not overtighten.
Step 12: Lower the vehicle and road test
- Use the floor jack to raise one end of the Escape at a time and remove the jack stands, then gently lower the vehicle to the ground.
- Start the engine and drive gently for 10–15 minutes, letting the transmission shift through all gears.
- Listen and feel for any abnormal behavior: slipping, harsh shifts, or warning lights. If anything feels wrong, stop and recheck the fluid level and for leaks.
✅ After Repair
- 🚗 After the road test, park on level ground and check under the Escape for any fresh fluid drips.
- 📊 If you have a scan tool, you can recheck fluid temperature and, if needed, repeat the level‑check procedure once more to be sure.
- 🧾 Note the mileage and date of this service so you can plan the next drain & refill (many owners repeat every 40,000–60,000 km).
- ♻️ Pour the used fluid into sealed containers and bring it to a recycling center or parts store that accepts waste oil.
💰 DIY vs Shop Cost
Shop Cost: $220–$380 (parts + labor)
DIY Cost: $70–$130 (fluid + small supplies)
You Save: $150–$250 by doing it yourself!
Shop labor rates vary but typically run $100–$150/hour. This repair takes a shop approximately 1.5–2.0 hours.
🎯 Ready to get started?
HowToo makes it easy: same-day/2-day shipping on every part, plus all the tools and specialty tools you need! Check out the parts and tools sections above to add everything to your cart.
Guide for replace for these Ford vehicles
| Year Make Model | Sub Model | Engine | Body Style |
|---|
