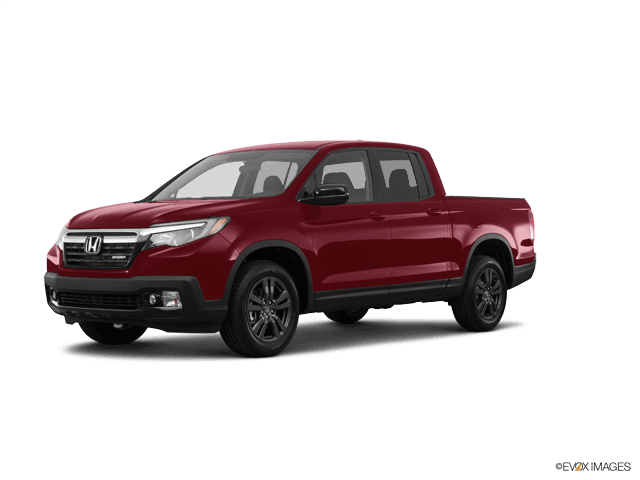
















2018 Honda Ridgeline “Check Fuel Cap” Fix: Clean & Inspect the Capless Fuel Filler
Step-by-step troubleshooting for capless seal issues, EVAP warnings, tools/parts needed, and when to replace an aftermarket locking cap
2018 Honda Ridgeline “Check Fuel Cap” Fix: Clean & Inspect the Capless Fuel Filler
Step-by-step troubleshooting for capless seal issues, EVAP warnings, tools/parts needed, and when to replace an aftermarket locking cap


🔧 Ridgeline - Fuel Cap Replacement
Your Ridgeline uses a capless fuel filler, so there isn’t a traditional screw-on fuel cap to replace. Most “fuel cap” issues on this model are actually a dirty/damaged capless seal, or an EVAP leak that triggers a warning message.
Quick question: Are you trying to replace an aftermarket locking gas cap, or are you seeing a “Check Fuel Cap” / MIL (check engine light) message?
Difficulty Level: Beginner | Estimated Time: 0.2-0.5 hours
⚠️ Safety & Precautions
- ⛽ Work outside or in a well-ventilated area; fuel vapor is flammable.
- 🔥 No smoking, sparks, or hot work lights near the fuel door.
- 🧤 Let the truck cool down before working near the rear wheel area.
- 🔋 Battery disconnect is not required for basic capless cleaning/inspection.
🔧 Required Tools
You'll need the following tools for this repair:
- Flashlight
- Nitrile gloves
- Safety glasses
- Clean lint-free shop towels
- Plastic trim tool
🔩 Required Parts
HowToo sells all the parts you need for this repair:
- Capless fuel filler cleaning kit - Qty: 1
- Fuel filler door spring (if fuel door won’t stay shut) - Qty: 1
- Fuel filler housing/seal components (capless filler parts, if damaged) - Qty: 1
📋 Before You Begin
- Park on level ground and shift to P.
- Turn the ignition OFF.
- Open the fuel door and keep a towel handy to catch any dirt.
🔨 Step-by-Step Instructions
Follow these steps in order:
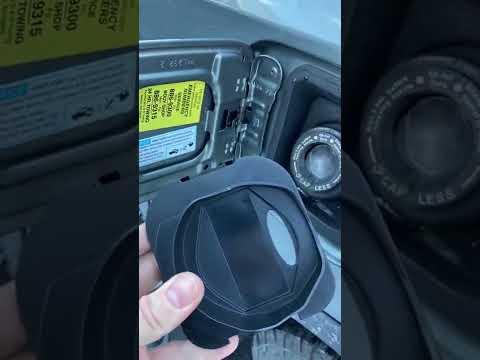
Step 1: Confirm you have a capless system
- Open the fuel door and look at the filler neck.
- If you see a spring-loaded inner flap (no threads for a cap), it’s capless.
- No cap to “replace” on OEM setup.
Step 2: Inspect the capless seal area (most common “fuel cap” problem)
- Use a flashlight to look for dirt, sand, or damage around the filler opening.
- Wipe the rim and surrounding area with clean lint-free shop towels.
- If the inner flap looks stuck, do not pry with metal tools.
Step 3: Clean the capless filler (if you have the cleaner)
- Put on nitrile gloves and safety glasses.
- Use the capless fuel filler cleaning kit as directed to clean the sealing surfaces.
- Wipe off residue with clean lint-free shop towels.
Step 4: Check fuel door operation
- Open/close the fuel door a few times by hand.
- If the door won’t close or pops open, use a flashlight to inspect the hinge/spring area.
- Use a plastic trim tool only if you need to gently move a stuck trim edge out of the way.
Step 5 (Only if you have an aftermarket locking gas cap): Replace it
- Remove the aftermarket cap by hand and compare it to the replacement for matching size/style.
- Install the new cap per the cap maker’s instructions (most tighten until it clicks or seats firmly).
- If it uses an adapter, make sure the adapter is fully seated and not cross-threaded.
✅ After Repair
- Start your Ridgeline and confirm the fuel door is closed properly.
- If you had a “Check Fuel Cap” or check engine light, it may take a few drive cycles to clear on its own.
- If the light stays on, the issue is often an EVAP leak (a leak in the fuel vapor system) and needs a scan for codes to pinpoint.
💰 DIY vs Shop Cost
Shop Cost: $120-$250 (diagnosis/inspection; more if EVAP parts are needed)
DIY Cost: $0-$25 (cleaning supplies/cleaning kit)
You Save: $95-$225 by doing it yourself!
Shop labor rates vary but typically run $100-$150/hour. This repair takes a shop approximately 0.3-0.8 hours.
🎯 Ready to get started?
HowToo makes it easy: same-day/2-day shipping on every part, plus all the tools and specialty tools you need! Check out the parts and tools sections below to add everything to your cart.
Guide for Fuel Tank Cap replace for these Honda vehicles
| Year Make Model | Sub Model | Engine | Body Style |
|---|