









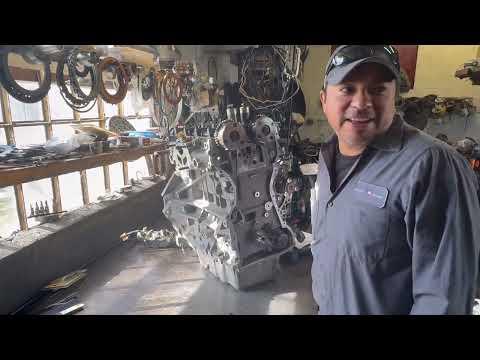






2017-2018 Ford Focus 2.0L Timing Belt Replacement? How to Diagnose & Replace the Timing Chain (Engine: Inline 4 2.0L)
Step-by-step timing chain service with required tools, parts list, safety tips, and common rattle/P0016 checks
2017-2018 Ford Focus 2.0L Timing Belt Replacement? How to Diagnose & Replace the Timing Chain (Engine: Inline 4 2.0L)
Step-by-step timing chain service with required tools, parts list, safety tips, and common rattle/P0016 checks for 2017, 2018


🔧 Focus - Timing Belt Replacement
Your Focus 2.0L does not use a timing belt—it uses a timing chain (inside the engine, oil-lubricated). There’s no routine “timing belt replacement” interval on this engine like older belt-driven designs.
Difficulty Level: Advanced | Estimated Time: 6-10 hours
⚠️ Safety & Precautions
- ⚠️ Let the engine cool fully; hot coolant/exhaust can burn.
- ⚠️ Support the vehicle with jack stands; never rely on a jack.
- ⚠️ If doing timing chain work: incorrect cam/crank timing can cause a no-start and internal damage.
- ⚠️ Disconnect the negative battery cable if you’ll remove engine mounts or work near the starter/alternator wiring.
🔧 Required Tools
You'll need the following tools for this repair:
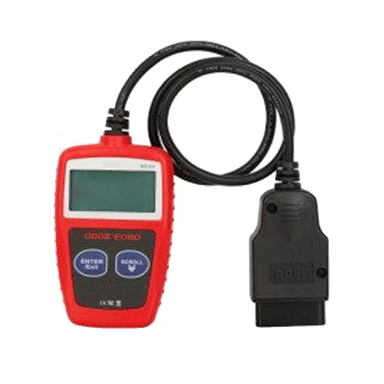
- OBD2 scan tool
- Floor jack (rated 3-ton minimum)
- Jack stands (rated 3-ton minimum)
- Wheel chocks
- Safety glasses
- Mechanic gloves
- 19mm socket
- 3/8" ratchet
- 1/2" breaker bar
- Torque wrench (10-200 Nm range)
- 7mm socket
- 8mm socket
- 10mm socket
- 15mm socket
- Long-handled 15mm wrench
- Flat trim tool
- Timing chain locking tool kit (specialty)
- Engine support bar (specialty)
🔩 Required Parts
HowToo sells all the parts you need for this repair:
- Timing chain kit (chain, guides, tensioner) - Qty: 1
- Front crankshaft seal - Qty: 1
- Front cover sealant (OEM-spec RTV) - Qty: 1
- Engine oil (OEM-spec) - Qty: 5 quarts
- Oil filter - Qty: 1
- Coolant (Motorcraft Yellow or equivalent) - Qty: 1
📋 Before You Begin
- 🧭 Park on level ground, set the parking brake, and chock the rear wheels.
- Lift the front-right corner and support it on jack stands.
- Quick check: Are you trying to fix a symptom (rattle on cold start / check engine light), or are you doing this as maintenance?
- Clarifier: Did you actually mean the serpentine/accessory belt (the outside belt that drives the alternator/AC)?
🔨 Step-by-Step Instructions
Follow these steps in order:
Step 1: Confirm it’s a timing chain issue (not an accessory belt)
- Use an OBD2 scan tool to check for cam/crank correlation codes (common ones are P0016-type).
- Listen at the front of the engine at cold start; a chain/tensioner issue often sounds like a brief metallic rattle.
- If unsure, stop here and tell me symptoms.
Step 2: Prepare access to the engine front
- Use a 19mm socket to remove the right-front wheel lug nuts.
- Remove the RF wheel and set it aside.
- Use a 7mm socket and 8mm socket to remove the inner fender/splash shield fasteners (varies by fastener style).
- Use a flat trim tool to pop any plastic clips without breaking them.
- Reinstall wheel later and Torque to 135 Nm (100 ft-lbs).
Step 3: Support the engine (required if mounts/brackets come off)
- Set up an engine support bar (specialty) across the strut towers and take the engine’s weight slightly.
- Engine support bar means a beam that holds the engine from above so mounts can be removed safely.
Step 4: Remove the accessory drive belt (for access)
- Use a long-handled 15mm wrench on the belt tensioner hex and rotate it to release tension.
- Slip the belt off a smooth pulley first, then remove it completely.
- Snap a photo of belt routing first.
Step 5: Set engine to timing position and lock it (critical)
- Use a timing chain locking tool kit (specialty) to lock the crankshaft and camshafts per Ford procedure.
- This “locking kit” holds the engine in the correct position so timing can’t move while the chain is off.
- If the engine is not locked, do not continue—timing can jump.
Step 6: Remove the front cover to access the timing chain
- Use a 10mm socket to remove front cover bolts (bolt lengths may vary—lay them out in order).
- Use a flat trim tool carefully to separate the cover without gouging aluminum surfaces.
- Drain and catch fluids as needed (oil/coolant may be disturbed during cover removal).
Step 7: Replace the chain, guides, and tensioner
- Remove the tensioner and guides using a 10mm socket.
- Install the new guides and new tensioner from the timing chain kit.
- Install the new chain, aligning timing marks exactly as the kit and Ford procedure specify.
- Do not reuse a questionable tensioner—weak tension is a common cause of startup rattle.
Step 8: Re-seal and reinstall the front cover
- Clean sealing surfaces thoroughly (no old RTV left behind).
- Apply OEM-spec RTV in the specified bead pattern and reinstall the cover.
- Use a torque wrench to tighten cover bolts evenly in stages. Torque specs vary by bolt location; if you want, I’ll give you the exact bolt-by-bolt torque map.
- Install a new front crankshaft seal as required.
Step 9: Reinstall accessory belt and wheelhouse parts
- Route the accessory belt correctly, then use the long-handled 15mm wrench to rotate the tensioner and slip the belt on.
- Reinstall the splash shield using the 7mm socket and 8mm socket.
- Reinstall the wheel using a 19mm socket and Torque to 135 Nm (100 ft-lbs).
Step 10: Refill fluids and verify timing
- Refill engine oil and replace the filter using a ratchet with the correct socket for your drain plug.
- Top off coolant as needed.
- Remove locking tools only after verifying everything is tight and timed correctly.
✅ After Repair
- Start the engine and listen for abnormal rattle/noise.
- Use an OBD2 scan tool to clear codes and confirm none return.
- Check for oil/coolant leaks around the front cover and crank seal.
- Recheck fluid levels after a short test drive.
💰 DIY vs Shop Cost
Shop Cost: ₹45,000-₹95,000 (parts + labor)
DIY Cost: ₹12,000-₹35,000 (parts only)
You Save: ₹33,000-₹60,000 by doing it yourself!
Shop labor rates vary but typically run ₹1,500-₹3,500/hour. This repair takes a shop approximately 6-10 hours.
🎯 Ready to get started?
HowToo makes it easy: same-day/2-day shipping on every part, plus all the tools and specialty tools you need! Check out the parts and tools sections below to add everything to your cart.
Guide for Engine Crankshaft Seal replace for these Ford vehicles
| Year Make Model | Sub Model | Engine | Body Style |
|---|---|---|---|
| 2018 Ford Focus | - | Inline 4 2.3L | - |
| 2018 Ford Focus | - | Inline 4 2.0L | - |
| 2018 Ford Focus | - | Inline 3 1.0L | - |
| 2017 Ford Focus | - | Inline 4 2.3L | - |
| 2017 Ford Focus | - | Inline 4 2.0L | - |
| 2017 Ford Focus | - | Inline 3 1.0L | - |