









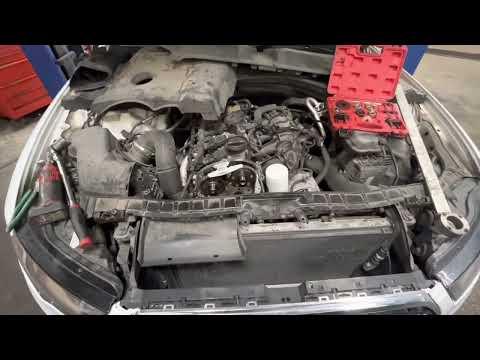







2016-2018 Audi A6 2.0T Timing Chain Replacement Guide (Timing Belt Not Applicable) (Trim: Premium | Engine: Inline 4 2.0L)
Step-by-step chain, tensioner, and guide replacement with tools, parts list, safety tips, and post-repair checks
2016-2018 Audi A6 2.0T Timing Chain Replacement Guide (Timing Belt Not Applicable) (Trim: Premium | Engine: Inline 4 2.0L)
Step-by-step chain, tensioner, and guide replacement with tools, parts list, safety tips, and post-repair checks for 2016, 2017, 2018


🔧 A6 - Timing Chain Replacement (Timing “Belt” Not Applicable)
Your A6’s 2.0L turbo uses a timing chain, not a timing belt. So there is no routine “timing belt replacement” service—when people ask for it on this engine, what they usually need is a timing chain/tensioner/guide repair due to noise, stretch, or timing faults.
Difficulty Level: Advanced | Estimated Time: 8-14 hours
⚠️ Safety & Precautions
- ⚠️ Work on a cold engine; hot coolant and turbo parts can burn you.
- ⚠️ Support the engine properly before removing any mounts.
- ⚠️ Do not rotate the crank/cams with the chain removed; valve damage can occur.
- ⚠️ Disconnect the negative battery terminal before starting.
- ⚠️ If you’re not using the correct Audi/VAG timing lock tools, stop—this job is timing-critical.
🔧 Required Tools
You'll need the following tools for this repair:
- Floor jack (rated 3-ton minimum)
- Jack stands (rated 3-ton minimum)
- Wheel chocks
- Safety glasses
- Nitrile gloves
- Mechanic’s light
- Metric socket set 8mm-18mm
- Metric wrench set 8mm-18mm
- Torx bit set T20-T45
- Triple-square bit set M8-M10
- 1/4" drive ratchet
- 3/8" drive ratchet
- 1/2" drive breaker bar
- Torque wrench (5-25 Nm range)
- Torque wrench (20-200 Nm range)
- Angle gauge (specialty)
- Trim clip removal tool
- Pry bar
- Serpentine belt tool or long 16mm wrench
- Drain pan (at least 10-quart)
- Coolant funnel
- Gasket scraper
- Brake cleaner
- Shop towels
- Paint marker
- Audi/VAG 2.0T timing lock tool kit (specialty)
- Crankshaft holding tool (specialty)
- VAG-capable scan tool (specialty)
🔩 Required Parts
HowToo sells all the parts you need for this repair:
- Timing chain kit - Qty: 1
- Timing chain tensioner - Qty: 1
- Timing chain guides/rails - Qty: 1 set
- Timing cover sealant (RTV approved for engine timing cover) - Qty: 1
- Timing cover gasket/seals (as applicable) - Qty: 1 set
- Crankshaft seal (front main seal) - Qty: 1
- Valve cover gasket - Qty: 1
- New one-time-use bolts (timing system/engine mount/crank bolt as applicable) - Qty: 1 set
- Engine oil (VW/Audi-approved full synthetic) - Qty: 5-6 quarts
- Oil filter - Qty: 1
- Coolant (Audi/VW-approved) - Qty: 1-2 gallons
📋 Before You Begin
- Park on level ground, set the parking brake, and chock the rear wheels.
- Disconnect the negative battery terminal using a 10mm socket.
- Raise the front of the car with a floor jack and support it with jack stands under the proper lift points.
- Have your VAG-capable scan tool ready for clearing codes and verifying cam/crank correlation after the repair.
- Timing lock tools prevent one-tooth mistakes.
🔨 Step-by-Step Instructions
Follow these steps in order:
Step 1: Remove undertrays and drain coolant
- Remove the lower splash shield using a Torx T25/T30 bit (varies by fastener) and a 3/8" ratchet.
- Place a drain pan under the radiator drain area.
- Drain coolant using the appropriate drain fastener with a Torx bit or by releasing the lower hose clamp with a hose clamp pliers (if equipped).
Step 2: Move the front end to service access (as needed)
- On the A6, access is tight—remove the front bumper cover and put the lock carrier into “service position” if required for your layout using Torx bits T25-T45 and triple-square bits.
- This creates space to remove the front timing cover safely.
Step 3: Remove intake ducting and engine cover
- Pull up the engine cover by hand (it is usually grommet-retained).
- Loosen intake clamps using a 7mm socket or flat screwdriver (as equipped) and remove the intake ducting.
Step 4: Remove the serpentine belt and front accessories blocking the timing cover
- Release belt tension using a serpentine belt tool or long 16mm wrench.
- Slip the belt off and set it aside.
- Remove any accessory brackets/pulleys blocking the timing cover using the required metric sockets and Torx bits.
Step 5: Support the engine (if an engine mount must be removed)
- Position a floor jack with a block of wood under the oil pan area and apply light support (do not lift aggressively).
- If a mount bracket crosses the timing cover, remove it using metric sockets and triple-square bits.
Step 6: Remove ignition coils and valve cover
- Unplug coil connectors and remove coils (use a trim clip removal tool gently if needed).
- Remove valve cover fasteners using the correct Torx bit and a 1/4" ratchet.
- Lift the valve cover off and remove the old gasket.
Step 7: Set engine to Top Dead Center (TDC) and lock timing
- Rotate the engine by hand at the crankshaft using a breaker bar and the correct socket until timing marks align.
- Install the Audi/VAG 2.0T timing lock tool kit (specialty). (A timing lock kit physically holds the crank/cams so they can’t move.)
- Mark chain and sprockets with a paint marker as a backup reference.
Step 8: Remove the timing cover
- Remove timing cover bolts using Torx bits and a 3/8" ratchet.
- Carefully separate the cover using a plastic trim tool or small pry bar at designated pry points.
- Clean sealing surfaces using a gasket scraper, brake cleaner, and shop towels.
Step 9: Replace chain, guides, and tensioner
- Relieve/remove the chain tensioner using the appropriate socket or Torx bit.
- Remove the chain guides/rails using Torx bits.
- Remove the old chain and install the new chain aligned to the timing marks.
- Install new guides and the new tensioner.
- Keep everything locked until fully reassembled.
Step 10: Verify timing alignment (critical check)
- Double-check all timing marks and your paint marks.
- With locks removed, rotate the engine by hand two full revolutions using a breaker bar, then re-check timing alignment.
- If anything is off, do not crank the engine—reset timing.
Step 11: Reseal and reinstall timing cover
- Install a new crank seal if removed using the correct driver from your timing tool kit (specialty).
- Apply the specified bead of timing cover sealant (RTV) to the cover per the sealant maker’s instructions.
- Install the cover and hand-start all bolts.
- Tighten cover fasteners evenly using a torque wrench to the Audi-specified torque for your bolt sizes.
Step 12: Reinstall valve cover, accessories, and belt
- Install the new valve cover gasket and reinstall the valve cover.
- Tighten valve cover fasteners evenly using a torque wrench to the Audi-specified torque for your fasteners.
- Reinstall brackets/pulleys using metric sockets and Torx bits.
- Reinstall the serpentine belt using the serpentine belt tool or long 16mm wrench.
Step 13: Refill fluids and reassemble front end
- Refill coolant using a coolant funnel with the correct Audi/VW-approved coolant mix.
- Change oil and filter if the front cover/crank seal area was opened extensively (recommended) using a drain pan and metric sockets.
- Reinstall undertrays and any front-end service position hardware using Torx bits and triple-square bits.
✅ After Repair
- Reconnect the battery using a 10mm socket.
- Start the engine and let it idle; listen for abnormal chain rattle.
- Check carefully for oil leaks at the timing cover and crank seal area.
- Bleed air from the cooling system by topping off as the thermostat opens; monitor temperature.
- Use a VAG-capable scan tool to clear faults and verify cam/crank correlation values are normal for your A6.
- Recheck coolant level after first drive.
💰 DIY vs Shop Cost
Shop Cost: $1,800-$3,500 (parts + labor)
DIY Cost: $450-$1,200 (parts only)
You Save: $1,350-$2,300 by doing it yourself!
Shop labor rates vary but typically run $100-$150/hour. This repair takes a shop approximately 8-14 hours.
🎯 Ready to get started?
HowToo makes it easy: same-day/2-day shipping on every part, plus all the tools and specialty tools you need! Check out the parts and tools sections below to add everything to your cart.
Guide for Engine Timing Chain Kit replace for these Audi vehicles
| Year Make Model | Sub Model | Engine | Body Style |
|---|---|---|---|
| 2018 Audi A6 | Premium | Inline 4 2.0L | - |
| 2018 Audi A6 | Premium Plus | Inline 4 2.0L | - |
| 2018 Audi A6 | Sport | Inline 4 2.0L | - |
| 2017 Audi A6 | Premium | Inline 4 2.0L | - |
| 2017 Audi A6 | Premium Plus | Inline 4 2.0L | - |
| 2016 Audi A6 | Premium | Inline 4 2.0L | - |
| 2016 Audi A6 | Premium Plus | Inline 4 2.0L | - |