


2009-2019 Toyota Corolla Timing Belt Replacement? How to Verify It Has a Timing Chain (Engine: Inline 4 1.8L)
Step-by-step belt vs. chain check, optional valve cover removal, tools, parts, and torque specs
2009-2019 Toyota Corolla Timing Belt Replacement? How to Verify It Has a Timing Chain (Engine: Inline 4 1.8L)
Step-by-step belt vs. chain check, optional valve cover removal, tools, parts, and torque specs for 2009, 2010, 2011, 2012, 2013, 2014, 2015, 2016, 2017, 2018, 2019
🔧 Corolla - Timing Belt Replacement (Not Applicable: Timing Chain Equipped)
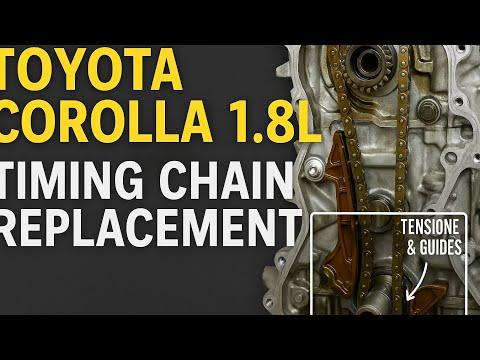
Your Corolla’s 1.8L engine uses a timing chain, not a timing belt. That means there’s no scheduled “timing belt replacement” service—chains are designed to last a long time and are typically only serviced if there’s a problem (noise, stretch, low oil pressure history, check-engine timing codes).
Difficulty Level: Beginner (verification) / Advanced (timing chain replacement) | Estimated Time: 0.2-0.5 hours (verification) / 6-10 hours (chain job)
⚠️ Safety & Precautions
- ⚠️ Work on a cool engine to avoid burns from the exhaust and radiator components.
- ⚠️ Keep fingers/tools away from moving parts if the engine is running.
- ⚠️ If you remove the valve cover, keep debris out of the engine (stuff clean rags around openings).
- ⚠️ Battery disconnect is recommended if you’ll be unplugging ignition coils or working near the starter wiring.
🔧 Required Tools
You'll need the following tools for this repair:
- 10mm socket
- 3/8" drive ratchet
- 3" extension (3/8" drive)
- Torque wrench (inch-pound, 20–200 in-lb range)
- Flathead screwdriver
- Flashlight
- Trim clip tool
- Nitrile gloves
- Safety glasses
🔩 Required Parts
HowToo sells all the parts you need for this repair:
- Valve cover gasket set - Qty: 1
- Small amount of RTV silicone sealant (engine-safe) - Qty: 1
📋 Before You Begin
- Park on level ground and set the parking brake.
- Let the engine cool fully.
- If removing the valve cover: disconnect the negative battery terminal using a 10mm socket.
🔨 Step-by-Step Instructions
Follow these steps in order:
Step 1: Do a quick “belt vs chain” check (fastest method)
- Open the hood and locate the engine oil fill cap on top of the valve cover.
- Remove the oil cap by hand.
- Use a flashlight to look through the oil fill hole.
- If you see metal links/plates, that’s the timing chain (no timing belt to replace).
Step 2: Optional: Remove the plastic engine cover (if equipped)
- Pull up to release the cover, or remove fasteners using a 10mm socket and 3/8" ratchet (varies by cover style).
Step 3: Optional: Remove ignition coils (to access the valve cover)
- Unplug each ignition coil electrical connector by lifting the lock tab with a flathead screwdriver, then pull the connector off.
- Remove coil hold-down bolts using a 10mm socket and 3/8" ratchet.
- Pull coils straight up and set them aside.
- Label coils 1–4 to reinstall same spots.
Step 4: Optional: Remove the valve cover (for a clearer look inside)
- Remove any small hoses or wiring clips attached to the cover using a trim clip tool and flathead screwdriver.
- Remove valve cover bolts using a 10mm socket, 3/8" ratchet, and extension.
- Lift the valve cover off carefully. If it’s stuck, gently tap and pry only at reinforced edges using a flathead screwdriver.
Step 5: Confirm timing chain and reassemble
- With the valve cover off, you’ll clearly see the timing chain and camshafts (no belt).
- Clean the valve cover sealing surfaces (do not let debris fall into the engine).
- Install the valve cover gasket set. Apply a small dab of RTV silicone sealant (engine-safe) only at the factory seam/joint corners (where the timing cover meets the cylinder head).
- Reinstall the valve cover bolts and tighten evenly using an inch-pound torque wrench: Torque to 8.4 Nm (74 in-lb).
- Reinstall ignition coils and bolts using a 10mm socket. (Coil bolt torque varies by supplier—snug plus a small turn; do not over-tighten.)
✅ After Repair
- Reconnect the negative battery terminal using a 10mm socket (if disconnected).
- Start the engine and listen for abnormal rattling from the timing cover area.
- Check for oil leaks around the valve cover perimeter.
💰 DIY vs Shop Cost
Shop Cost: $0 (no timing belt service) / $900-$2,000+ (timing chain repair if needed)
DIY Cost: $0-$40 (verification) / $200-$600+ (chain parts if needed)
You Save: $0-$1,400+ by doing it yourself!
Shop labor rates vary but typically run $100-$150/hour. This repair takes a shop approximately 0.2-0.5 hours (verification) or 6-10 hours (chain job).
🎯 Ready to get started?
HowToo makes it easy: same-day/2-day shipping on every part, plus all the tools and specialty tools you need! Check out the parts and tools sections below to add everything to your cart.
Guide for Engine Valve Cover Gasket Set replace for these Toyota vehicles
| Year Make Model | Sub Model | Engine | Body Style |
|---|---|---|---|
| 2019 Toyota Corolla | - | Inline 4 1.8L | - |
| 2018 Toyota Corolla | - | Inline 4 1.8L | - |
| 2017 Toyota Corolla | - | Inline 4 1.8L | - |
| 2016 Toyota Corolla | - | Inline 4 1.8L | - |
| 2015 Toyota Corolla | - | Inline 4 1.8L | - |
| 2014 Toyota Corolla | - | Inline 4 1.8L | - |
| 2013 Toyota Corolla | - | Inline 4 1.8L | - |
| 2012 Toyota Corolla | - | Inline 4 1.8L | - |
| 2011 Toyota Corolla | - | Inline 4 1.8L | - |
| 2010 Toyota Corolla | - | Inline 4 1.8L | - |
| 2009 Toyota Corolla | - | Inline 4 1.8L | - |
