















How to Bed Brakes on a 2021 Chevrolet Camaro 1LE Brembo Package
Step-by-step pad and rotor break-in procedure with safety tips and lug torque specs
How to Bed Brakes on a 2021 Chevrolet Camaro 1LE Brembo Package
Step-by-step pad and rotor break-in procedure with safety tips and lug torque specs


🔧 Camaro - Brake Pad & Rotor Bedding Procedure
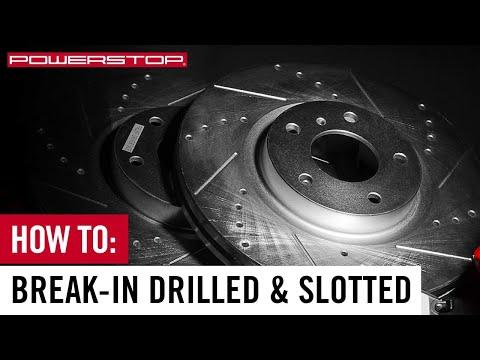
This guide covers how to properly bed-in your new SP Performance double cross-drilled rotors and Brembo brake pads on your Camaro with the 1LE brake package. Bedding-in, also called burnishing, gradually transfers a thin, even layer of pad material onto the rotor surface so the brakes stop smoothly, resist vibration, and perform consistently.
Difficulty Level: Beginner | Estimated Time: 45-60 minutes
⚠️ Safety & Precautions
- ⚠️ Use a long, open, low-traffic road where you can safely accelerate and slow down repeatedly without stopping in traffic.
- ⚠️ Do not perform this procedure in neighborhoods, parking lots, or on wet, icy, sandy, or gravel roads.
- ⚠️ Your brakes will get very hot. Do not touch the rotors, calipers, wheels, or pads after bedding.
- ⚠️ Do not come to a complete stop with the brake pedal held down during the hot bedding phase. This can imprint pad material unevenly onto the rotors.
- ⚠️ Expect some smell, light smoke, and increased brake dust during the procedure. This is normal if braking remains smooth.
- ⚠️ If the pedal becomes soft, braking feels unsafe, or the car pulls hard to one side, stop the procedure and let the brakes cool while driving gently.
- ⚠️ Cross-drilled rotors should be heat-cycled progressively. Avoid panic stops or track-style braking until the rotors and pads are fully bedded.
🔧 Required Tools
You'll need the following tools for this repair:
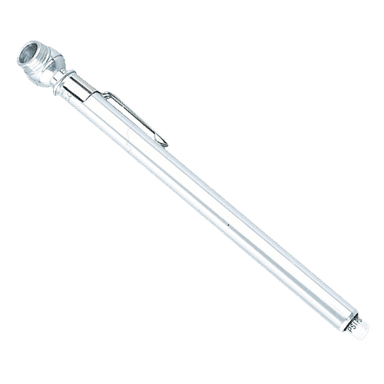
- Tire pressure gauge
- Wheel chocks
- Torque wrench rated to 150 ft-lbs
- 22mm socket
- Safety glasses
- Nitrile gloves
🔩 Required Parts
HowToo sells all the parts you need for this repair:
- SP Performance front double cross-drilled rotors - Qty: 2
- SP Performance rear double cross-drilled rotors - Qty: 2
- Brembo P37018N front brake pad set - Qty: 1
- Brembo P11024N rear brake pad set - Qty: 1
- Brake cleaner - Qty: 1-2 cans
📋 Before You Begin
- ✅ Confirm the pad and rotor installation is complete before bedding. All caliper hardware must be tight, pads seated, and brake pedal firm.
- ✅ Use the torque wrench rated to 150 ft-lbs with the 22mm socket to verify each wheel lug nut is tightened to Torque to 190 Nm (140 ft-lbs).
- ✅ Use the tire pressure gauge to set tire pressures before driving. Uneven tire pressure can make braking feel uneven.
- ✅ Use the wheel chocks only while parked during your pre-check. Remove them before driving.
- ✅ Avoid using the parking brake immediately after the bedding drive while the rear rotors are hot.
- ✅ Bedding works best when rotors are clean. If needed, use brake cleaner with nitrile gloves and safety glasses to remove oily residue before the first drive.
- ✅ A torque wrench is a tool that tightens bolts to an exact force so they are not too loose or too tight.
- ✅ Assumption: this procedure is for street bedding after correct installation of the 1LE Brembo brake system parts.
🔨 Step-by-Step Instructions
Follow these steps in order:
Step 1: Do a Brake Pedal Check Before Moving
- With the engine off, press the brake pedal several times using your foot until it feels firm.
- Start the engine and press the brake pedal again. It should drop slightly, then feel firm and controlled.
- If the pedal sinks to the floor or feels spongy, do not drive. The brake system needs inspection before bedding.
- Firm pedal first, bedding second.
Step 2: Verify Wheel Lug Nut Torque
- Park on level ground and place the transmission in Park.
- Use the torque wrench rated to 150 ft-lbs and 22mm socket to check every lug nut.
- Tighten in a star pattern so the wheel seats evenly.
- Torque to 190 Nm (140 ft-lbs).
- Do this before the brakes get hot, not after the bedding drive.
Step 3: Pick the Right Road
- Drive to a straight, open road where you can safely slow from highway speed several times.
- Keep plenty of space behind and ahead of your Camaro.
- Do not start bedding in stop-and-go traffic.
- Leave the traction and stability systems on for street bedding.
Step 4: Warm the Brakes Gently
- Make 5 gentle stops from about 40 mph down to 20 mph.
- Use light-to-moderate pedal pressure. Do not activate ABS.
- Drive for 30-60 seconds between each stop to allow some airflow over the rotors.
- This gradually warms the pads, rotors, calipers, and brake fluid.
Step 5: Begin the Main Bedding Stops
- Accelerate to about 60 mph.
- Brake firmly down to about 15 mph.
- Do not come to a complete stop.
- Repeat this 6-8 times.
- Use firm pressure, but stay just below ABS activation.
- If ABS pulses through the pedal, reduce pressure slightly on the next stop.
- ABS is the anti-lock brake system; it rapidly pulses the brakes to prevent wheel lockup.
Step 6: Add Heat Gradually for the 1LE Brembo Package
- After the first 6-8 stops, drive for 2-3 minutes at 40-50 mph without using the brakes much.
- Then make 3-4 harder stops from about 70 mph down to 20 mph.
- Again, do not stop completely.
- This helps the larger 1LE Brembo brake package build an even transfer layer across the rotor faces.
- A transfer layer is a very thin film of brake pad material on the rotor surface.
- Smooth pressure beats sudden stabbing.
Step 7: Avoid Holding the Brake Pedal While Hot
- During bedding, never sit still with your foot pressing the brake pedal after a hard stop.
- If you must stop, leave extra room and creep forward slightly when safe.
- If stopped on a flat area, use light pedal pressure only as needed.
- Do not set the parking brake while the rear rotors are hot.
Step 8: Cool the Brakes Without Stopping
- Drive for 10-15 minutes at 45-60 mph with little or no braking.
- This cool-down is critical for cross-drilled rotors because it reduces thermal shock.
- Thermal shock means a part heats or cools too quickly, which can stress the metal.
- If you smell brakes or see light smoke, keep driving gently to move air through the brakes.
Step 9: Park Carefully After the Cool-Down
- Park on a level surface after the brakes have cooled from airflow driving.
- Place the transmission in Park.
- Avoid using the parking brake if the rotors still smell hot.
- Do not spray water on the brakes. Let them cool naturally.
Step 10: Inspect After the Brakes Are Cool
- After at least 30-60 minutes of cooling, look through the wheels with safety glasses on.
- The rotor faces should look evenly swept where the pads contact them.
- A light gray or blue-gray tint can be normal after bedding.
- Heavy streaks, deep grooves, vibration, or loud grinding means the brakes need inspection before aggressive driving.
Step 11: Drive Normally for the Next 100-200 Miles
- For the next 100-200 miles, avoid panic stops unless needed for safety.
- Avoid holding the brake pedal after hard stops.
- Do not do track sessions until the brakes feel consistent and the rotors show an even contact pattern.
- Normal street braking will continue to finish the bedding process.
Step 12: Recheck Lug Nut Torque Cold
- After the car sits and the wheels are fully cool, use the torque wrench rated to 150 ft-lbs and 22mm socket again.
- Recheck each lug nut in a star pattern.
- Torque to 190 Nm (140 ft-lbs).
- Only check torque when the wheels are cool.
✅ After Repair
- ✅ The brake pedal should feel firm and consistent after bedding.
- ✅ Some brake smell and dust are normal during the first bedding cycle.
- ✅ A smooth, even rotor contact surface is the goal.
- ✅ If you feel steering wheel shake during braking, brake shudder, grinding, or a pull to one side, stop aggressive use and inspect the installation.
- ✅ For track use, complete a separate track heat cycle before pushing hard. Start with moderate laps, cool the brakes, then increase pace.
- ✅ Avoid washing the car or spraying cold water on hot rotors right after bedding.
💰 DIY vs Shop Cost
Shop Cost: $100-$225 for brake bedding/road test after installation
DIY Cost: $0-$20 if you already have the parts installed
You Save: $100-$205 by doing it yourself!
Shop labor rates in the Reno area commonly run about $130-$180/hour. This procedure takes a shop approximately 0.5-1.0 hour.
🎯 Ready to get started?
HowToo makes it easy: same-day/2-day shipping on every part, plus all the tools and specialty tools you need! Check out the parts and tools sections below to add everything to your cart.
Guide for Disc Brake Pad Set replace for these Chevrolet vehicles
| Year Make Model | Sub Model | Engine | Body Style |
|---|