


How to Replace Windshield Wiper Blades on a 2018 Dodge Durango
Step-by-step DIY guide for front and rear wiper blade replacement, tools, parts, safety tips, and cost savings
How to Replace Windshield Wiper Blades on a 2018 Dodge Durango
Step-by-step DIY guide for front and rear wiper blade replacement, tools, parts, safety tips, and cost savings


🔧 Durango - Windshield Wiper Blade Replacement
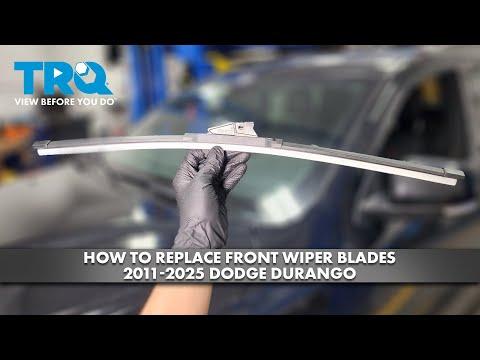
You’ll be removing the old wiper blades from your Durango and snapping new ones into the factory wiper arms. This improves visibility and prevents streaking or chatter in rain and snow.
Difficulty Level: Beginner | Estimated Time: 15-25 minutes
⚠️ Safety & Precautions
- ⚠️ Turn the ignition off and remove the key so the wipers do not move while you work.
- ⚠️ Do not let the bare metal wiper arm snap back onto the glass; it can crack the windshield.
- ⚠️ If you use a step stool, make sure it is stable and on level ground.
🔧 Required Tools
You'll need the following tools for this repair:
- 🛠️ Small flathead screwdriver (3-4 mm tip)
- 🛠️ Step stool (if needed to comfortably reach windshield)
- 🛠️ Clean microfiber towel
- 🛠️ Disposable nitrile gloves
🔩 Required Parts
HowToo sells all the parts you need for this repair:
- 🔩 Front driver-side wiper blade (22") - Qty: 1
- 🔩 Front passenger-side wiper blade (21") - Qty: 1
- 🔩 Rear wiper blade (12") - Qty: 1
- 🔩 Small packet of washer-safe rubber-safe silicone grease - Qty: 1
- 🔩 Windshield washer fluid (all-season) - Qty: 1 gallon
📋 Before You Begin
- 🧾 Park your Durango on level ground, set the parking brake, and turn the ignition off.
- 🧾 Make sure the wiper arms are in their normal “parked” position at the bottom of the windshield.
- 🧾 If the windshield is dirty, wipe the rubber contact area with the clean microfiber towel first so grit doesn’t scratch the glass when you test the new blades.
- 🧾 You do not need to disconnect the battery for this job.
🔨 Step-by-Step Instructions
Follow these steps in order:
Step 1: Lift the front wiper arms
- Use the step stool if needed so you can comfortably reach the wiper arms without stretching.
- With one hand on the base of the arm, gently pull the driver-side wiper arm away from the windshield until it locks in a raised position.
- Place the clean microfiber towel on the glass under the raised wiper as insurance in case the arm slips.
- Always control the arm with one hand.
Step 2: Release the old front wiper blade (hook-style arm)
- Most Durangos use a “J-hook” style wiper arm. This is a curved metal end shaped like the letter J that the blade clips onto.
- Use the small flathead screwdriver to gently lift the plastic locking tab on the wiper blade where it meets the hook.
- While holding the tab up with the small flathead screwdriver, slide the blade downward (toward the open end of the hook) to unhook it.
- Once it is off the hook, slide the blade completely off the arm and set it aside.
- Do not twist the arm; pull straight.
Step 3: Attach the new front wiper blade
- Take the new driver-side blade and identify the adapter that matches the J-hook. Most replacement blades come with several adapters; use the one already installed or the one labeled for “hook” or “J-hook.”
- With the arm still raised, orient the new blade so it curves with the windshield (not backwards).
- Hook the metal J end of the wiper arm into the opening on the blade adapter.
- Pull the blade upward onto the hook until you hear or feel a click. Use your free hand or the small flathead screwdriver to gently press the locking tab if needed to seat it.
- Lightly tug on the blade by hand to make sure it’s locked and does not slide off.
- If it doesn’t click, it’s not seated.
Step 4: Lower the driver-side arm onto the glass
- With one hand firmly holding the arm, slowly lower the new blade back onto the windshield.
- Remove the clean microfiber towel from under the blade.
- Lower gently, never let it snap.
Step 5: Repeat for the passenger-side front wiper
- Use the step stool again if needed for a safe, comfortable position.
- Lift the passenger-side arm away from the windshield and place the clean microfiber towel under it.
- Use the small flathead screwdriver to lift the locking tab, slide the old blade off the hook, and remove it.
- Install the new passenger-side blade the same way: slide the hook into the adapter and pull until it clicks.
- Gently lower the arm back onto the windshield and remove the clean microfiber towel.
Step 6: Replace the rear wiper blade
- Move to the rear of your Durango and open the liftgate to give yourself room to work.
- Gently lift the rear wiper arm away from the rear glass. It will not lift as far as the front arms; that’s normal.
- Most rear blades on the Durango use a side-clip style mount:
- Use the small flathead screwdriver to gently pry up the small plastic cover or tab at the center of the blade where it meets the arm.
- Once the tab is lifted, slide the blade away from the arm pivot and off the mount.
- Align the new rear blade with the arm mount and slide it into place until it clicks and the cover/tab snaps back down. Use the small flathead screwdriver lightly if needed to help the tab seat.
- Lower the rear wiper arm gently back onto the rear glass.
Step 7: Optional – Lightly condition the rubber
- Put on your disposable nitrile gloves to keep grease off your hands.
- Apply a tiny amount of the silicone grease to a corner of the clean microfiber towel.
- Lightly wipe along the rubber edge of each new blade once. Do not leave visible grease on the glass-contact edge; just a light film on the rubber.
- Too much grease can cause streaking.
Step 8: Top off washer fluid
- Open the hood using the inside hood release, then the safety latch under the front edge of the hood.
- Locate the washer fluid reservoir cap (usually blue with a windshield/water spray symbol).
- Remove the cap by hand and pour in the windshield washer fluid (all-season) until it reaches near the top of the reservoir neck.
- Reinstall the cap by hand and close the hood firmly.
✅ After Repair
- ✅ Start your Durango and spray the windshield washer while running the front wipers on low speed. Check that both front blades wipe cleanly with no streaks or chattering.
- ✅ Turn on the rear wiper and washer to confirm the rear blade wipes evenly without skipping.
- ✅ Make sure all blades are firmly attached by visually checking that the adapters are fully seated and there are no loose parts.
- ✅ If you hear any loud slapping or see missed areas, re-check that each blade is the correct size and fully locked into its mount.
💰 DIY vs Shop Cost
Shop Cost: $90-$140 (parts + labor)
DIY Cost: $35-$70 (parts only)
You Save: $55-$70 by doing it yourself!
Shop labor rates vary but typically run $100-$150/hour. This repair takes a shop approximately 0.3-0.5 hours.
🎯 Ready to get started?
HowToo makes it easy: same-day/2-day shipping on every part, plus all the tools and specialty tools you need! Check out the parts and tools sections below to add everything to your cart.