


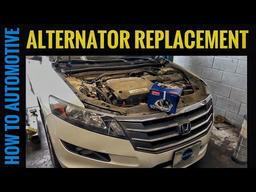


2014 Honda Crosstour Alternator Replacement Guide: Steps, Torque, Tips
2014 Honda Crosstour Alternator Replacement Guide: Steps, Torque, Tips
Crosstour - Alternator Replacement 🔧
Beginner-friendly guide for your V6 with clear steps and safety tips.
Safety First
- 🛑 Disconnect the negative battery cable first. The alternator carries high current.
- 🧤 Let the engine cool completely. Hot coolant hoses and pulleys can burn.
- 🧯 Keep fingers and clothing away from belt pulleys.
Parts & Specs
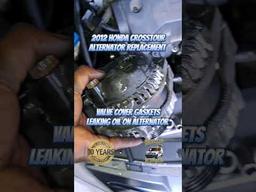
- 🧩 Alternator: 130A unit for J35Y V6 (EX). Verify by VIN.
- 🧩 Serpentine belt (recommended): 7‑rib. Replace if cracked or glazed.
- 🧩 New O-ring for upper radiator hose quick-connect if disconnected (only if removed).
- 🧷 Torque specs:
- Alternator mounting bolts: 41 N·m (30 lb-ft)
- Alternator bracket-to-engine bolts: 54 N·m (40 lb-ft)
- Belt tensioner pivot bolt: 54 N·m (40 lb-ft)
- Battery terminal nut: 5 N·m (44 in-lb)
Required Tools
- 🧰 Metric socket set (10, 12, 14, 17mm), ratchet, and extensions.
- 🧰 Serpentine belt tool or long 14mm wrench: a long, thin wrench that gives leverage to release belt tension.
- 🧰 Torque wrench (in-lb and ft-lb).
- 🧰 Flat trim tool: plastic pry tool to pop clips without damage.
- 🧰 Needle-nose pliers for clips and connectors.
- 🧰 Fender cover or towel to protect paint.
Overview
- 🗺️ Access is from the top on the front (passenger) side. You’ll remove the engine cover and air intake duct for room, release the belt, then unbolt and lift the alternator out.
Step-by-Step Procedure
- 🔋 Prepare the vehicle
- Park on level ground. Set parking brake. Open hood.
- Record radio presets if needed.
- Disconnect negative (-) battery cable at the battery.
- 🛠️ Remove covers and intake ducting
- Lift off the plastic engine cover (pull-up grommets).
- Loosen the air intake tube clamps (10mm) at the air box and throttle body.
- Unplug the MAF (mass airflow sensor) connector at the air box. Press tab, pull straight off.
- Remove the intake tube and the upper air box snorkel as needed for space.
- 🧲 Relieve serpentine belt tension
- Place the belt tool or 14mm wrench on the tensioner hex (center of the tensioner pulley).
- Rotate clockwise to unload the belt. Slide belt off the alternator pulley only. Take a photo of the belt routing.
- Let the tensioner return gently. Do not let it snap.
- 🔌 Disconnect alternator wiring
- Remove the plastic cap on the alternator B+ post. Remove the 12mm nut and lift off the B+ cable.
- Unplug the 3‑pin alternator connector (press lock tab). Inspect for corrosion.
- 🔩 Remove alternator
- Remove the upper and lower alternator mounting bolts (14mm). Support the unit with your hand on the last threads.
- If the alternator feels stuck, gently pry at the boss with a plastic/wood wedge. Do not pry on the pulley.
- Lift the alternator out upward. You may need to shift a coolant hose slightly; avoid kinks and do not disconnect unless necessary.
- 🧼 Prep and install new alternator
- Compare the new unit: clocking, plug, pulley diameter, and mounting ears should match.
- Clean the mounting pads on the bracket.
- Set the alternator in place. Hand-thread both mounting bolts fully.
- Torque alternator mounting bolts to 41 N·m (30 lb-ft) in two passes.
- 🔗 Reconnect wiring
- Install the B+ cable, torque the nut to 9 N·m (80 in‑lb), and snap the cap back on. Snug only—do not over-tighten.
- Plug in the 3‑pin connector until it clicks.
- 🧵 Reinstall serpentine belt
- Route the belt per your photo or the routing decal. Ensure all ribs are seated in every pulley groove.
- Rotate the tensioner clockwise and slip the belt over the alternator pulley last. Release tensioner slowly.
- Double-check alignment on all pulleys. Misalignment will squeal.
- 🧩 Reassemble intake
- Reinstall intake tube/snorkel. Tighten clamps snug (do not strip).
- Reconnect the MAF connector.
- Reinstall engine cover.
- 🔎 Reconnect battery and check
- Reconnect the negative battery cable. Torque to 5 N·m (44 in‑lb).
- Start the engine. Check charging voltage at the battery: 13.9–14.8 V at idle with lights off.
- Listen for belt noise and ensure the battery light stays off.
Tips & Tricks
- 💡 If the belt is old, replace it now; it’s already off.
- 💡 If you hear chirping after, recheck belt alignment and clean pulley grooves with a dry brush.
- 💡 A memory saver (small device that keeps radio settings via OBD) can preserve presets, but it’s optional.
Post-Repair Notes
- 🧭 No special scan-tool coding or battery registration is required on your model.
- 🧭 The PCM may relearn idle after battery disconnect; let it idle with all accessories off for a few minutes, then drive normally.
All parts we sell at HowToo have lightning-fast same-day shipping!
Guide for replace for these Honda vehicles
| Year Make Model | Sub Model | Engine | Body Style |
|---|
