









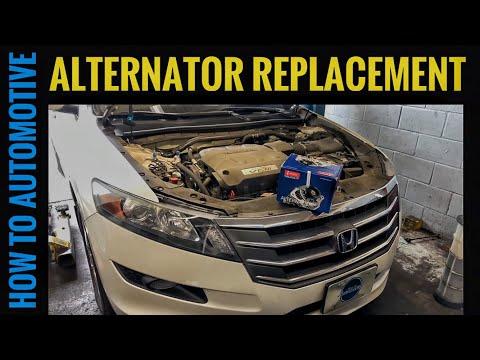





2013-2015 Honda Crosstour Alternator Replacement Guide: Tools, Torque, Steps (Engine: Inline 4 2.4L)
2013-2015 Honda Crosstour Alternator Replacement Guide: Tools, Torque, Steps (Engine: Inline 4 2.4L)


Crosstour - Alternator Replacement 🔧
Great choice tackling this yourself—I’ll guide you step-by-step. Before we begin:
- 🔹 Do you have basic hand tools and a serpentine belt tool (a slim breaker bar to release belt tension)?
- 🔹 Will you be replacing the serpentine belt as preventative maintenance? It’s smart if it’s older than ~60k miles.
What you’ll need 🧰
- 🛠️ Tools:
- 10mm, 12mm, 14mm sockets (alternator, brackets, covers)
- 17mm socket (belt tensioner)
- 3/8" and 1/2" ratchets + short extensions
- Serpentine belt tool or long-handled ratchet for tight space
- Torque wrench (tightens fasteners to spec accurately)
- Trim clip tool (forked tool to pop plastic clips without breaking)
- Needle-nose pliers (for harness clips)
- Multimeter (checks battery/charging voltage)
- Fender cover (protects paint while leaning in)
- 🧩 Parts:
- Alternator (3.5L J35Y V6; 130A spec for EX-L with AWD)
- Serpentine belt (optional but recommended)
- Dielectric grease (protects electrical contacts)
- 🛡️ Safety:
- Disconnect negative battery cable before starting
- Let engine cool fully; you’ll be working near the radiator
- Wear eye protection and gloves
Torque specs and key values 📐
- 🔩 Battery terminals: 5–7 N·m (44–62 in‑lb)
- 🔩 Alternator B+ terminal nut: 9–12 N·m (80–106 in‑lb)
- 🔩 Alternator mounting bolts: 44 N·m (33 lb‑ft)
- 🔩 Belt tensioner bolt (pivot): 54 N·m (40 lb‑ft) if loosened
Prep steps 🧭
- 🔹 Park on level ground, set parking brake, key off, hood up.
- 🔹 Save radio presets if you like. No coding required on your Crosstour.
- 🔹 Disconnect negative (-) battery cable with a 10mm socket and isolate it.
Accessing the alternator (top-side service) 🧩
- 🔹 Remove the engine cover (pulls up off grommets).
- 🔹 Unclip and move aside the intake snorkel/duct from the airbox to open space at the front-left of the engine bay (10mm bolts and clips).
- 🔹 If needed for room, release the upper radiator fan shroud clips on the left and gently shift the harness aside. Gives a bit more hand clearance.
Remove the serpentine belt 🌀
- 🔹 Note the belt routing diagram on the radiator support. If missing, take a photo.
- 🔹 Place a 17mm socket on the belt tensioner’s hex and rotate clockwise to relieve tension. Slide the belt off the alternator pulley. Do not let fingers get pinched.
- 🔹 If replacing the belt, pull it out fully. If reusing, leave it draped and remember the routing.
Disconnect alternator wiring ⚡
- 🔹 Remove the rubber boot from the rear of the alternator and undo the B+ nut (12mm). Lift the main charging cable off. Cap the cable to avoid dirt.
- 🔹 Press the tab and unplug the 2‑pin alternator connector. Use needle-nose if the tab is stubborn—don’t pry on the plastic body.
Remove alternator 🔩
- 🔹 Remove the alternator mounting bolts (usually two 14mm). They may be snug; break loose evenly.
- 🔹 Wiggle the alternator forward and up. If tight, gently pry at the cast ear against the bracket using a flat bar—protect aluminum with a rag.
- 🔹 Lift the alternator out through the top. If space is tight, slightly pivot the radiator fan shroud for clearance; do not force.
Install new alternator ✅
- 🔹 Position the new unit, align the ears to the bracket. Slide in the mounting bolts by hand first to avoid cross‑threading.
- 🔹 Torque the mounting bolts to 33 lb‑ft (44 N·m).
- 🔹 Apply a tiny dab of dielectric grease to the connector seal and plug in the 2‑pin connector.
- 🔹 Install the main charging cable and torque the B+ nut to 80–106 in‑lb (9–12 N·m), then refit the rubber boot.
Reinstall belt and components 🔁
- 🔹 Route the belt per the diagram. Ensure all ribs sit perfectly in the pulley grooves.
- 🔹 Use the 17mm on the tensioner, rotate clockwise, slip the belt over the alternator pulley, and release slowly.
- 🔹 Reinstall the intake snorkel/duct and any clips you removed. Refit the engine cover.
Battery reconnect and charging check 🔋
- 🔹 Reconnect the negative battery cable and torque to 44–62 in‑lb.
- 🔹 Start the engine. With a multimeter across the battery, you should see about 13.8–14.7V at idle with no heavy loads. Turn on headlights and blower—voltage should remain above ~13.5V.
- 🔹 Confirm the battery/charging light is off. No scan-tool reset or coding is required on your Crosstour.
Tips & common pitfalls 💡
- 🔹 If the belt squeals after install, one rib may be mis-seated. Shut off and re-check routing.
- 🔹 If charging voltage is low, check the alternator fuse (120A–130A “ALT” in under-hood fuse box) and the battery ground strap.
- 🔹 Consider replacing the belt tensioner if the belt had visible cracks or glazing; weak tensioners reduce alternator output at idle.
Parts & tools from HowToo 🛒
I’ll show you the correct alternator, belt, tensioner, and all tools below. You can add them to your cart from the tools and parts section.
Want me to include belt and tensioner replacement steps too? 🤝
Say the word and I’ll add them. Also, tell me if you prefer OEM or premium aftermarket for the alternator.
HowToo makes it easy: same-day/2-day shipping on every part, plus all the tools and specialty tools you need!
Guide for Alternator replace for these Honda vehicles
| Year Make Model | Sub Model | Engine | Body Style |
|---|---|---|---|
| 2015 Honda Crosstour | - | V6 3.5L | - |
| 2014 Honda Crosstour | - | V6 3.5L | - |
| 2013 Honda Crosstour | - | V6 3.5L | - |