


How to Replace the Cabin Air Filter on a 2022 Honda CR‑V
Step-by-step DIY cabin filter change with tools, parts list, safety tips, and post-replacement checks
How to Replace the Cabin Air Filter on a 2022 Honda CR‑V
Step-by-step DIY cabin filter change with tools, parts list, safety tips, and post-replacement checks


🔧 CR-V - Cabin Air Filter Replacement
This job replaces the cabin air filter that cleans the air coming through the vents in your CR-V. A fresh filter helps the A/C and heater work better and keeps dust and smells down inside the cabin.
Difficulty Level: Beginner | Estimated Time: 15-25 minutes
⚠️ Safety & Precautions
- 🔹Turn the ignition off and remove the key or switch off the START/STOP button so the blower fan cannot start while you work.
- 🔹Do not force plastic clips on the glove box; they can crack if bent too far.
- 🔹If you have anything heavy in the glove box, remove it first so it doesn’t fall on you.
🔧 Required Tools
You'll need the following tools for this repair:
- 🔹Phillips #2 screwdriver
- 🔹Flat trim removal tool (plastic)
- 🔹Flashlight
- 🔹Shop towel
- 🔹Mechanic gloves
- 🔹Safety glasses
🔩 Required Parts
HowToo sells all the parts you need for this repair:
- 🔹Cabin air filter - Qty: 1
- 🔹Interior trim cleaning wipes - Qty: 1 pack
📋 Before You Begin
- 🔹Park your CR-V on level ground and set the parking brake.
- 🔹Turn off the climate control system completely.
- 🔹Open the glove box and remove any items inside, especially heavy ones.
- 🔹Put on safety glasses and gloves to protect your eyes and hands.
🔨 Step-by-Step Instructions
Follow these steps in order:
Step 1: Open and empty the glove box
- 🔹Open the glove box on the passenger side fully.
- 🔹Remove all papers and objects so nothing falls out while you work.
- 🔹Use the flashlight to look inside and get familiar with the sides and hinges.
Step 2: Detach the glove box damper arm
- 🔹On the right side of the glove box, look for a small plastic arm attached to the glove box; this is the damper arm (it slows the glove box when it opens).
- 🔹Gently support the glove box with one hand.
- 🔹Use the flat trim removal tool to carefully pry the damper arm off the small peg on the glove box side.
- 🔹Let the damper arm hang down; do not pull it hard.
Step 3: Release the glove box side stops
- 🔹On both sides of the glove box opening, there are small plastic “stops” that prevent the glove box from dropping straight down.
- 🔹Gently squeeze the sides of the glove box inward with your hands to clear these stops from the dash frame.
- 🔹Once they clear, let the glove box rotate downward and hang, giving you access behind it.
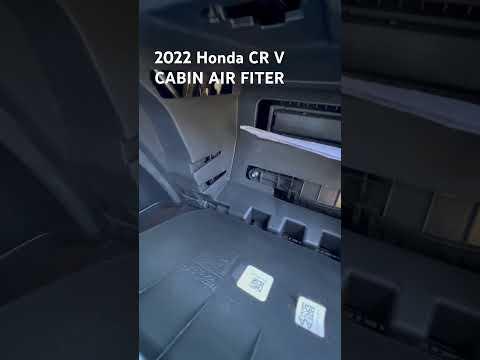
Step 4: Locate the cabin air filter cover
- 🔹With the glove box hanging down, look straight behind it toward the dash; you’ll see a rectangular black plastic door/housing.
- 🔹Shine the flashlight on it; this is the cabin air filter cover.
Step 5: Remove the cabin air filter cover
- 🔹On most 2022 CR-V models, the cover has two small side tabs.
- 🔹Pinch or press the tabs inward with your fingers to release the cover.
- 🔹Pull the cover straight toward you and set it aside on a shop towel.
- Do not force the tabs; they break easily.
Step 6: Remove the old cabin air filter
- 🔹Grasp the exposed edge of the filter and slowly pull it straight out.
- 🔹If it catches, wiggle gently side to side, but do not bend it hard.
- 🔹Note the direction of the airflow arrow printed on the side of the old filter (usually pointing downward on the CR-V).
- 🔹Place the dirty filter on the shop towel so dust does not fall on the floor.
Step 7: Clean the filter housing area (optional but recommended)
- 🔹Use the shop towel to gently wipe dust from the housing opening where the filter slides in.
- 🔹Do not push debris deeper into the system; wipe outward toward you.
- A quick wipe helps airflow and keeps it cleaner.
Step 8: Install the new cabin air filter
- 🔹Look on the side of the new filter for the printed "AIR FLOW" arrow.
- 🔹On your CR-V, the air flows from top to bottom, so the arrow should point down when installed.
- 🔹Slide the new filter straight into the housing with the arrow pointing down, keeping it flat and square.
- 🔹If it feels tight, pull it out and check that it is not twisted and is aligned with the grooves in the housing.
Step 9: Reinstall the cabin air filter cover
- 🔹Align the cover with the housing opening.
- 🔹Push it straight in until both side tabs click into place.
- 🔹No torque spec here; just make sure it is fully seated and not loose.
Step 10: Reattach and close the glove box
- 🔹Lift the glove box back up toward its normal position.
- 🔹Squeeze the sides slightly again so the side stops go back past the dash opening, then let them snap back into place.
- 🔹On the right side, snap the damper arm back onto its peg by hand; no tools needed.
- 🔹Open and close the glove box a few times to make sure it moves smoothly and does not fall down.
Step 11: Put everything back and tidy up
- 🔹Return your items to the glove box.
- 🔹Use an interior trim cleaning wipe to clean any fingerprints from the dash and glove box area.
✅ After Repair
- 🔹Start the engine and turn on the A/C or fan.
- 🔹Cycle through low, medium, and high blower speeds and check that air is flowing well from all vents.
- 🔹Switch between fresh air and recirculate modes and confirm there are no unusual noises from the passenger side dash.
- 🔹You may notice a slightly fresher smell and smoother airflow after a few minutes.
💰 DIY vs Shop Cost
Shop Cost: $60-$120 (parts + labor)
DIY Cost: $15-$40 (parts only)
You Save: $45-$80 by doing it yourself!
Shop labor rates vary but typically run $100-$150/hour. This repair takes a shop approximately 0.3-0.5 hours.
🎯 Ready to get started?
HowToo makes it easy: same-day/2-day shipping on every part, plus all the tools and specialty tools you need! Check out the parts and tools sections above to add everything to your cart.
